
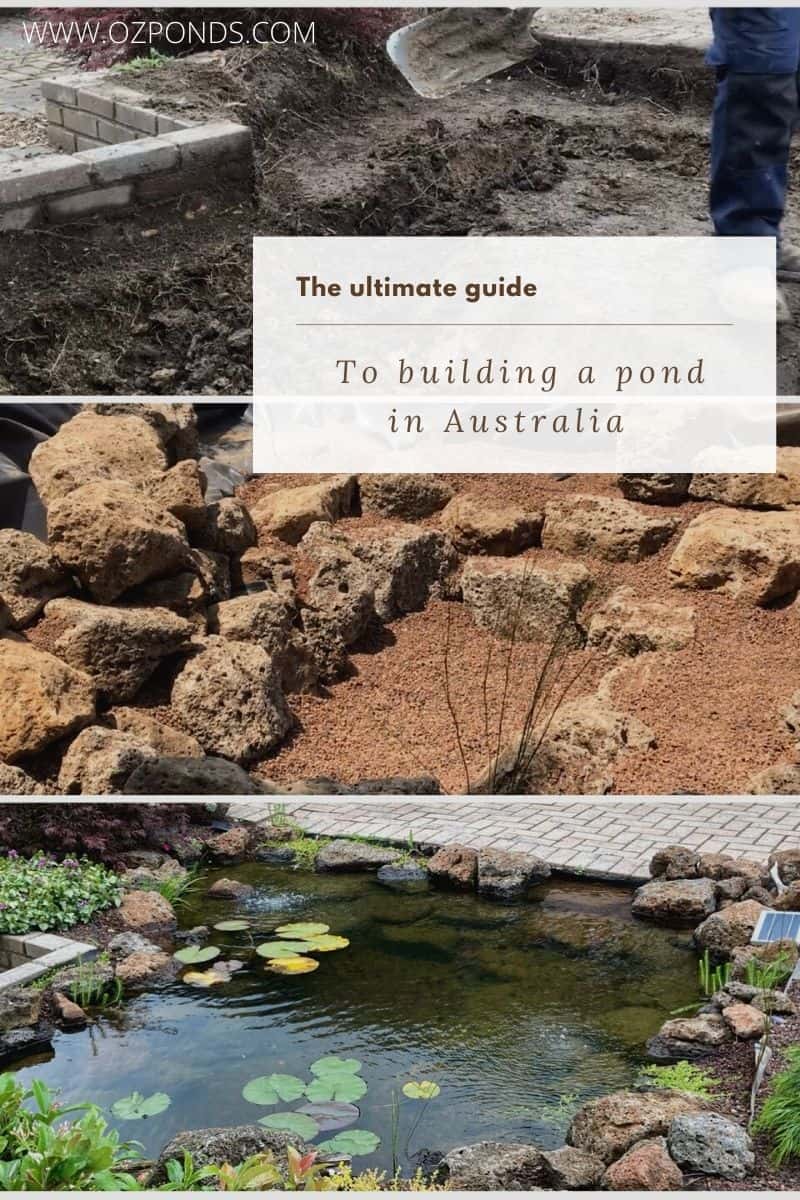
I live in Australia and when I wanted to build a pond I couldn’t find any decent guides for the type of natural looking pond I wanted to build. So this is my guide I’ve written after building and maintaining many ponds in my own backyard.
Hopefully this guide will also help people not in Australia who also want to create a natural looking pond, with crystal clear water, but without spending a fortune.
If you want a handy downloadable pdf with all the formulas I use when I build my ponds.
Design Your Pond Using The Same System I Use
- A simple system that has helped people around the world design clear, low-maintenance ponds without spending a fortune.
- Includes access to the Private Ozponds community and Virtual Kev, a tool that helps you plan your pond step-by-step.
Position- Where should I build my pond?
As the saying goes its all about location, location, location!
I feel it’s the same with a pond.
The first place people want to build a pond is in a low spot in the backyard. They figure the water already sits there anyway.
This is actually the worst place you can put your pond!
Low spots in the yard are where all the runoff goes. You actually do not want runoff entering your pond. It contains all kinds of nasties.
Water runoff will deposit a ton of nutrients into the pond. Nutrients will lead to algae blooms and just gross water quality.
Don’t put your pond in a low spot!
The other place people think they might like to put the pond is that far off corner they don’t use.
Wrong!
Put the pond as close to the house or entertaining area as possible.
The pond is outside, but we spend most of our time at home indoors. Try and position the pond so I can enjoy it from inside the house as well as outside.

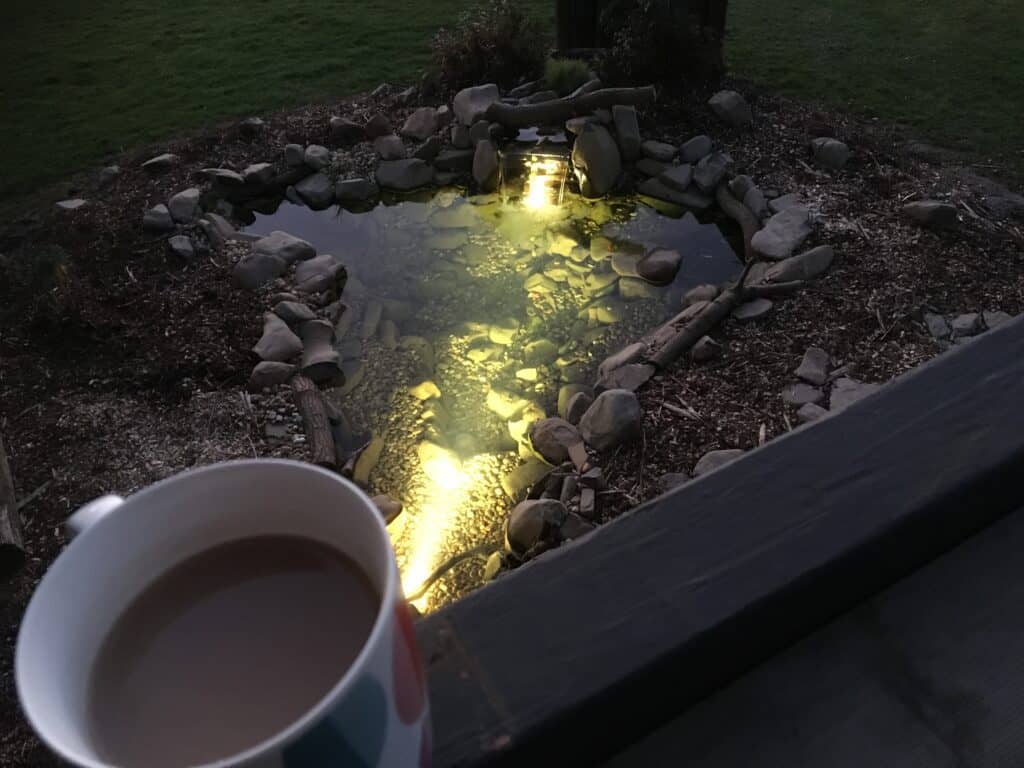
My favourite pond is my courtyard pond.
I can see the entire pond and waterfalls from the kitchen sink.I can also see it from my office as I look out the window. I can take 5 steps out the door and sit down beside it with a cold beer or a cup of tea.
My point is this pond is so visible and so close, that it can be enjoyed rain, hail or shine.
If you have it stuck in your head that the far off corner is the best spot, at the very least incorporate an area for some chairs and a fire pit.
You need to make it a destination!
Sun vs shade
There are benefits to both and disadvantages.
A pond in the shade will have less algae. This is because algae is a very simple plant and prefers a sunny area in warm water.
The disadvantage of a pond in the shade is it’s usually under trees which will drop leaves into the pond.
If leaves are left to decompose in the pond they will release ammonia and other nutrients that can cause issues with water health and quality.
In a reasonable sized pond under trees a skimmer or intake bay (article on skimmers) will be an essential part of the ponds filtration (we will talk filtration more in a minute).
Small ponds under trees may not warrant a skimmer as the material that falls in can easily be removed by hand or with a net.
A pond in the sun is more susceptible to green water. This is caused by single celled algae.
Our Aussie sun has a real bite to it. A pond in the sun needs plenty of biological filtration to help prevent green water.
Here is a video on how I increased the biological filtration on one of my first ponds when it went green.
A UV clarifier (Amazon Link) will also fix green water, but a bog filter is completely natural and has numerous other benefits.
The other thing to add to a pond in full sun is water lilies. The big will create some shade and the flowers are spectacular.
A pond in the shade will struggle to produce flowers on the water lilies.
So as you can see advantages and disadvantages. I think the best thing you can do is position it where you will get the most enjoyment.
If thats in the shade put the pond there. If it’s the sun well… you know what to do.
Filtration- Best filters for ponds
There are a few different ways to filter water. Biologically, chemically, mechanically and using plants.
The most important filter is the biological filter. Then comes the mechanical filter.
If these two types of filters are set up correctly maintaining your pond will be a breeze.
So let’s quickly talk about both.
Biological
So a biological filter gets its name because it’s a living, breathing filter. It needs nitrifying bacterias and micro-organisms to work.
In an aquatic environment such as a pond there is something very important happening its called the nitrogen cycle.
This cycle converts harmful compounds (Ammonia and Nitrite) into less harmful nitrate. This keeps the water safe and healthy for fish and other aquatic life.
It’s much like the ways trees filter carbon dioxide into oxygen for us on land.
For the nitrogen cycle (link to my article on the nitrogen cycle) to thrive we need lots and lots of nitrifying bacteria. These bacteria grow naturally on all wet surfaces.
If you are slightly handy I recommend that you build your own biological filter. No need to waste money on expensive filters..
Building a biological filter is very easy and can be done cheaply.
My personal preference is a bog filter, they provide pristine water quality and are almost zero maintenance.
I have many articles on bog filters because I think it’s the best filter any pond can have.
If you would like to learn how to build a bog filter you can read my article or watch the video below.
For those who can’t be bothered building their own cheap filters, look at getting a complete pond kit. These come with everything you need, apart from rock, plants and fish.
Below is a video showing how I built a pond kit in one weekend.
Mechanical
The mechanical filter physically removes waste.
Stuff is going to find its way into your pond. Most commonly it will be leaves and dust.
If this “stuff” isn’t filtered it will release nutrients onto the water.
In a small pond it’s easy enough to scoop the stuff out. But if you want to create something larger you’ll want a more maintenance light approach.
Enter the skimmer. A pond skimmer will pull any floating debris into it.
Within the skimmer is a basket and often filter pads. The basket will collect all the leaves, while the filter pads collect the fine materials like dust and fish poo.
Just as with the biological filter i recommend people build their own skimmers.
I’m all about saving money where i can!
Here is a video showing how a skimmer works and how i built my own using a simple bucket.
Again if you can’t be bothered making your own and want to purchase one ready to go. For small ponds look into floating or adjustable pond skimmers (Amazon link).
If you size the skimmer appropriately you should only need to check on it once a week. I’m terrible and I’m lucky if I check mine once a month!
Big pond vs small pond
Does size matter?
Obviously it’s much easier to build a small pond and they can be kept in confined areas like patios or courtyards.
But a small pond does have a few disadvantages.
Disadvantages of a small pond:
- Smaller bodies of water are more unstable. This means that the temperature can swing widely.
- Should be positioned in the shade. Because the smaller volume of water is unstable a must not to place the pond in the sun. The water will get too warm during the day and cool rapidly at night. This will stress the fish.
- Limited in the types of fish you can keep.
I class a small pond anything under 1000 litres. On these ponds I don’t worry about a skimmer. But a good biological filter is essential.
Here is a small patio pond I created using a wine barrel. It has a bog (biological filter) sitting on top.
A bigger pond involves a little more work initially but will be less maintenance over time.
Advantages of a bigger pond:
- Much more stable water parameters.
- Can be positioned in the full sun or shade.
- Less maintenance.
- More choices of fish that can be kept.
I love all my ponds, regardless of size. Some of my smaller ponds I don’t even have a pump or a dedicated filter. Check out this article on no filter ponds.
If you want to build a larger pond you might like to check out this overview video on how I built my dream pond.
Do ponds need a fence or permits?
At the time of writing this article fish ponds don’t require a fence, where I live, according to my council.
In NSW you currently need to submit a development application for a pond that is deeper than 30cm. You can apply online through the NSW planning portal.
Permitting doesn’t appear to be a big issue in the other states at least not for fish or ornamental ponds.
What I always recommend is to send an email to your local council. That way you have a response in writing.
Design Your Pond Using The Same System I Use
- A simple system that has helped people around the world design clear, low-maintenance ponds without spending a fortune.
- Includes access to the Private Ozponds community and Virtual Kev, a tool that helps you plan your pond step-by-step.
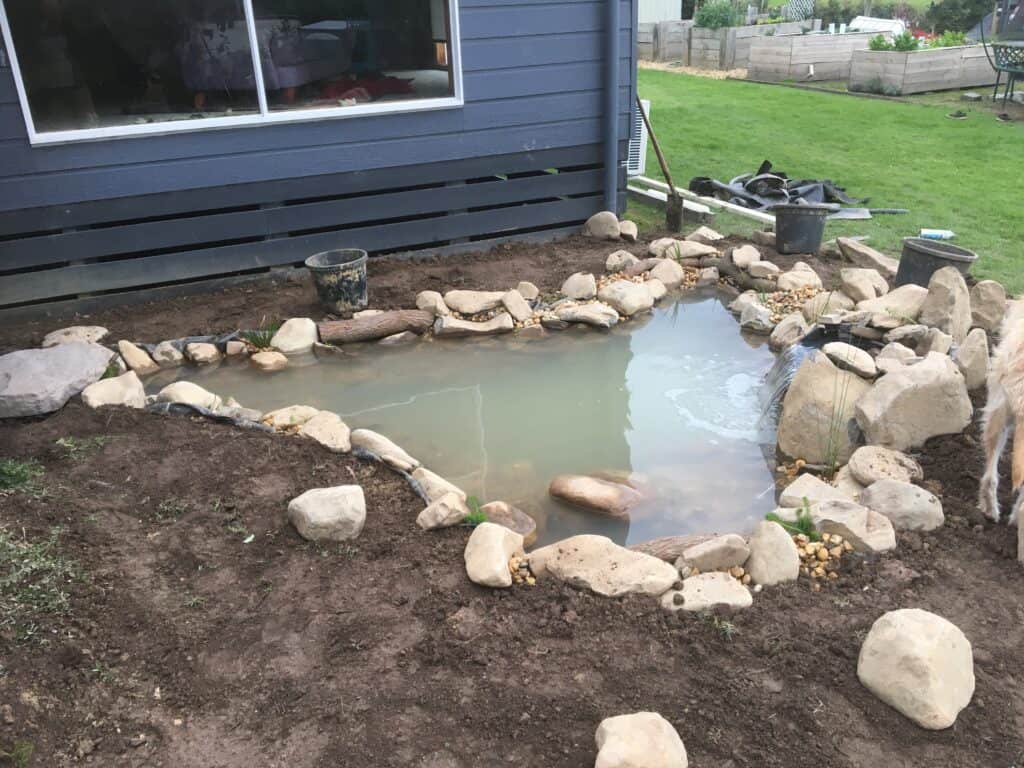
Digging the pond
A pond in our climate should be at least 60cm deep. The entire pond doesn’t need to be that deep just a section.
Deeper water will stay cooler in summer and warmer in winter. This provides more stable temperatures for the fish.
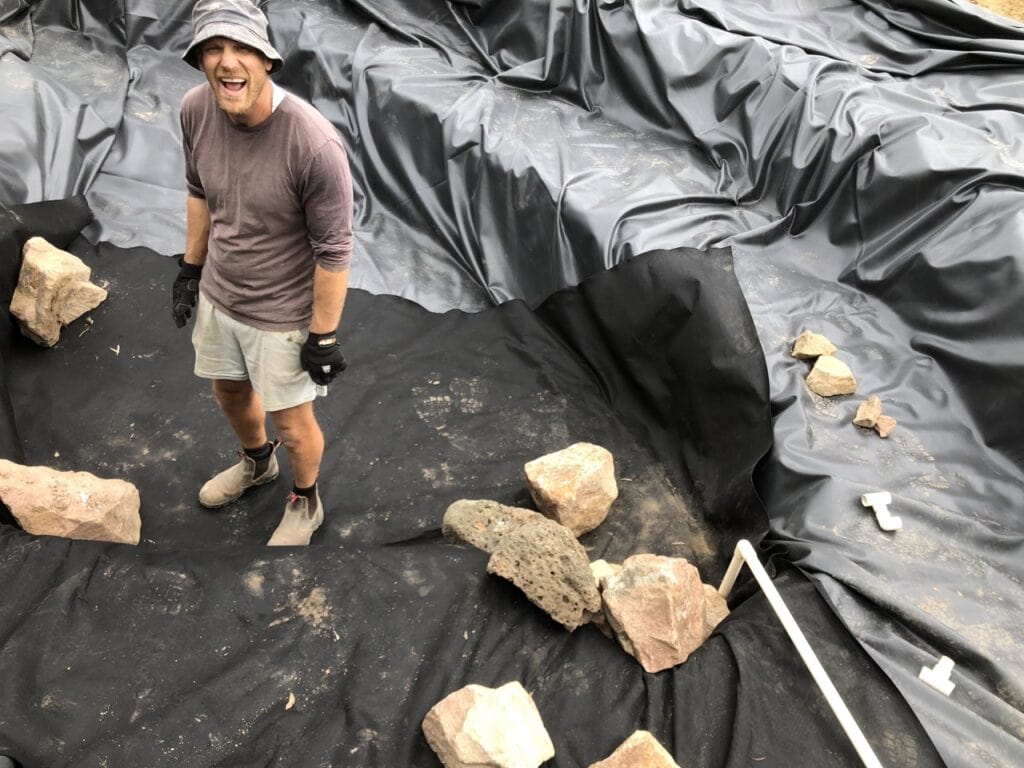
If you will be using rocks and gravel which I highly recommend, you will want to create shelves or tiers. This gives you a nice flat surface to place your large rocks or boulders.
You then backfill behind the large rocks with pebbles or gravel.
It is best to start placing the rocks in the bottom of the pond and work your way out.
While you are rocking the pond in is a good time to install any lights and jets, so you can disguise the cords and pipe work.
The soil you dig out can be spread out to form a berm. This berm is a great place to add a steam or waterfall entering the pond.
Streams provide extra filtration and waterfalls improve the oxygen levels in the water.
Make some of the shelves wider than others. Think about where you would like to place aquatic plants. Marginal and trailing plants will soften the rocks.
An average sized pond say 3 X 4 metres can easily be dug by hand.
The equipment you will need:
- Good long handled shovel (easier on the back than short handled shovels)
- Pick or crowbar (if digging conditions are difficult)
- Spirit level
- Wheelbarrow
- Fridge trolley (handy for moving larger rocks)
Before you place down the pond liner I recommend adding a geotextile underlayment.
This will provide a soft cushion to protect the liner. If the ground was quite rocky spreading 2-3 cm of sand over the top of the shelves and bottom of the pond is wise.
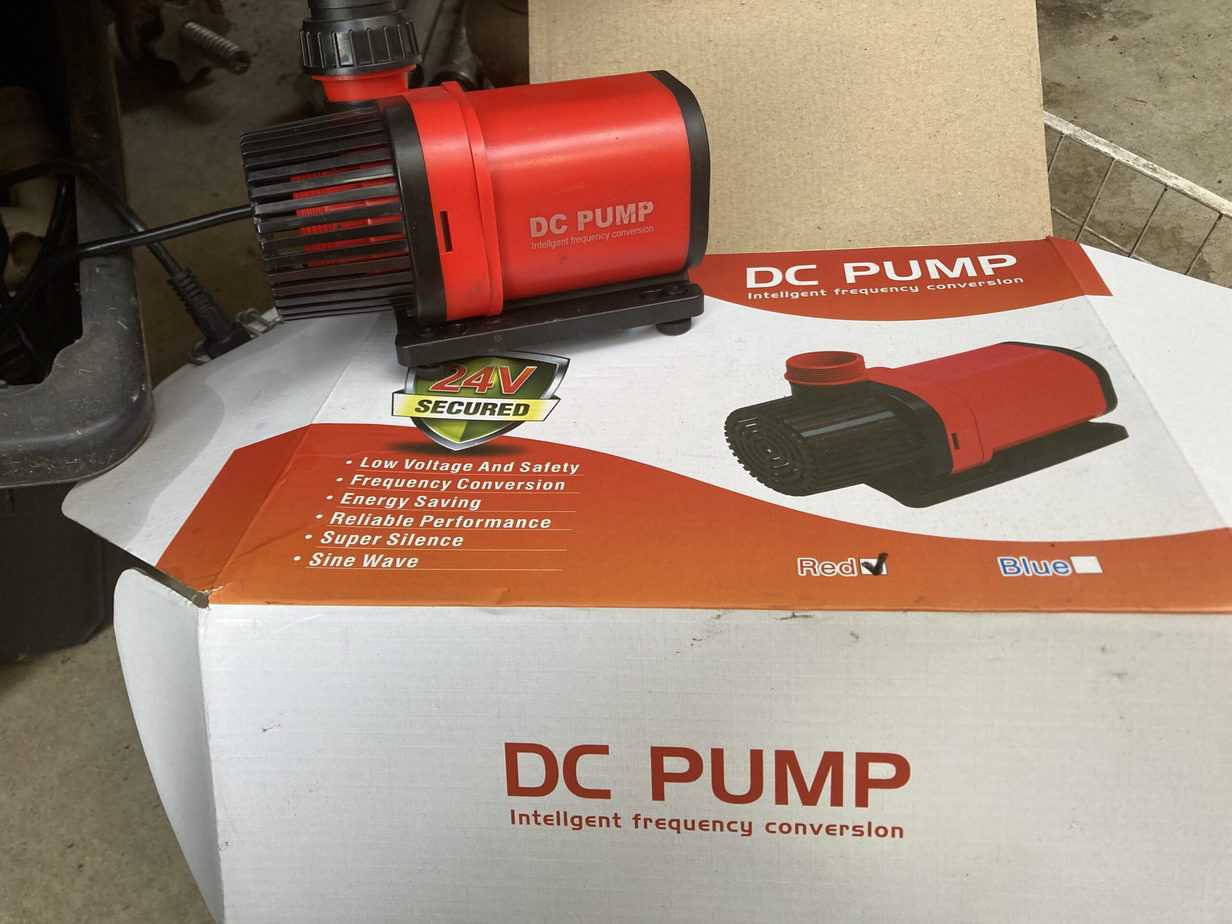
Pump selection
Selecting the right pond pump is very important. It is better to oversize the pump that undersize it.
As a very general rule you want something that will turn the water over at least once every hour.
For example if the pond is 2500 litres, you want a pump that will pump minimum of 2500 litres per hour.
What type of pump?
I recommend you select a submersible pond pump. These are the easiest to install and are build specifically to be completely submerged in water.
Select one that will cut off automatically if it runs dry. This is referred to as “dry mode protection”.
There are tons of pond pumps to choose from. I prefer to use low volt pumps as they are “safer” and can be easily extended.
A pond pump should never be turned off so it’s important to select something that is energy efficient.
Solar pond pumps aren’t quite there yet. I have tried the battery models and they are ok, but still too expensive to buy and won’t provide reliable output.
I use solar pumps to help boost circulation, but more on that later.
240 volt pumps tend to be cheaper to purchase and run, you will need an electrician to install an outdoor powerpoint if one isn’t located nearby.
I am currently testing some low volt DC pond pumps that are incredibly energy efficient.
UPDATE: Low volt DC pumps are now my favourite!
All submersible pond pumps have a cage around them to stop large solids from passing through and damaging the impeller.
Some pumps will allow larger material to pass than others. Something to consider if you plan on stocking larger, messy fish.

The Equipment I Use In My Ponds
If you’re building a pond, choosing the right equipment can make a huge difference to reliability and maintenance.
This is a list of the pumps, liners, treatments, and other products I personally use when building and maintaining my ponds.
Where to place the pond pump
If you have a skimmer the pump is placed inside. Some of the smaller in pond skimmers you will connect the pump to the skimmer with hose or tubing.
In a small without a skimmer place the pump about 15cm above the bottom of the pond. Use some bricks or rocks.
This will help with maintenance as it won’t get clogged very often if at all.
It will also mean that if a pipe burst between the pump and the filter some water will remain in the pond for the fish.
Either way always position the pump on the opposite end to the inflow. This will ensure good circulation.
If you want to protect baby fish from being sucked into the pump sit it in a pot and cover with an aquarium filter sponge. See video below.
Streams & Waterfalls
As water is pumped above the surface level of the pond it creates friction or resistance. This is referred to as head height.
All pond pumps will have a graph or table that shows how high they can pump water above the surface. As the head height increases the pump output decreases.
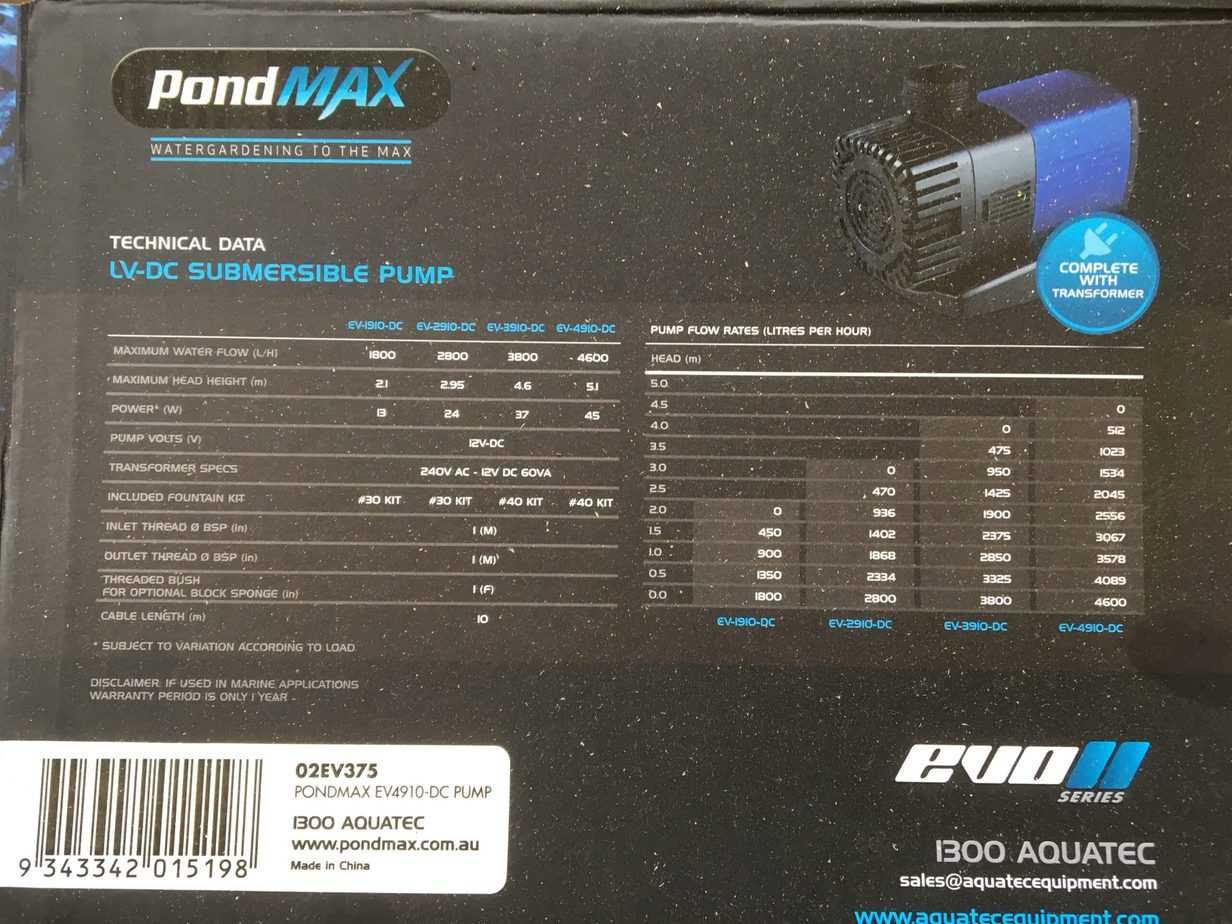
This is important to take note of if you are creating a waterfall or stream.
Pipe length will also add friction or head height. Every 1 metre of pipe length will add 10cm of head height.
So if you are pumping higher than the surface of the pond. Or adding a stream and waterfall, understanding the head height graph of the pump is a must.
The last thing to be aware of is the width of water you would like cascading over the waterfall or running through the stream.
For a 30cm wide stream or waterfall you need a minimum of 4000 litres per hour.
15cm would be minimum of 2000 litres per hour.
45cm needs 6000 litres per hour.
You get the idea.
Remember though this is the minimum if you want decent sound, and thicker water double or triple the volume.
Pond Equipment in Australia
I’ve partnered up with Rock Around The Block, a leading pond retailer here in Australia. There is a discount code: OZPONDS
They stock high quality Liner, Underlayment, Pumps, Lightning and more. Click the button below to check out their range.
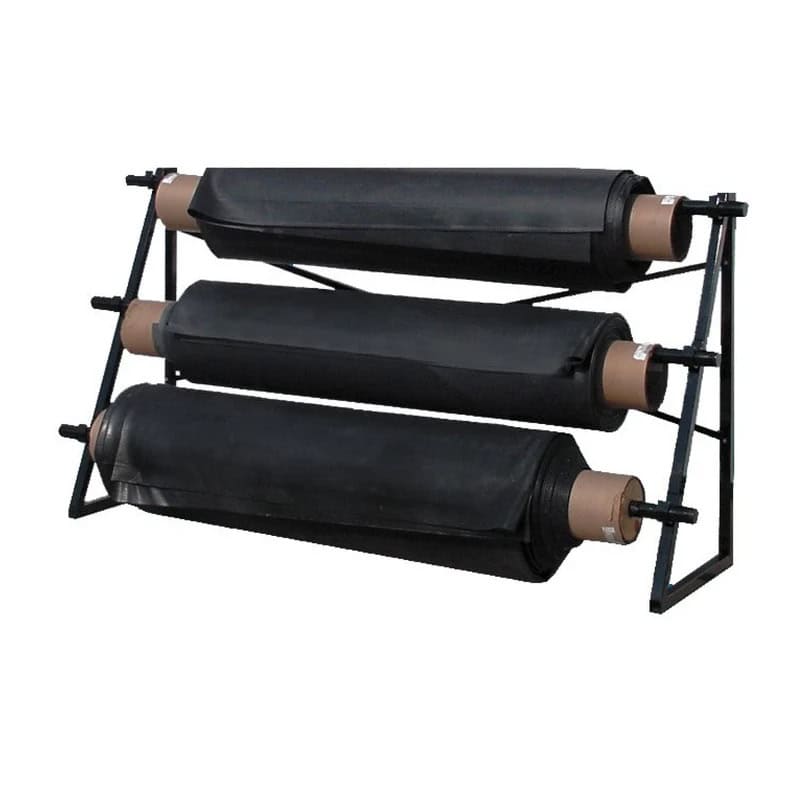
Pond Liner options
You can build a pond out of anything that will hold water. Ive built ponds out of wine barrels, storage tubs, bath tubs and plastic drums.
But if you are building the pond in the ground, you’ll need to use a pond liner.
Some people still insist on using concrete but it just ends up being more work in the end.
The main options are PVC, HDPE and EPDM.
I’ll be honest with you EPDM rubber is expensive, but it is the best!
It’s stretchy, strong and easy to work with. It comes with a 20 year guarantee but expect it to last at least 50 years without issue.
Oh and it’s easy to fix if you do get a puncture.
If you would like to learn more about PVC and HDPE, click to read my article on selecting a pond liner, or watch the video below.
Calculating how much pond liner you need
To calculate the amount of pond liner you need you will measure the width, length and deepest point.
You add the width + 2 times the depth with the length + 2 times the depth. Then add and extra 50cm to each just to be safe.
Heres a quick free calculator is you want.
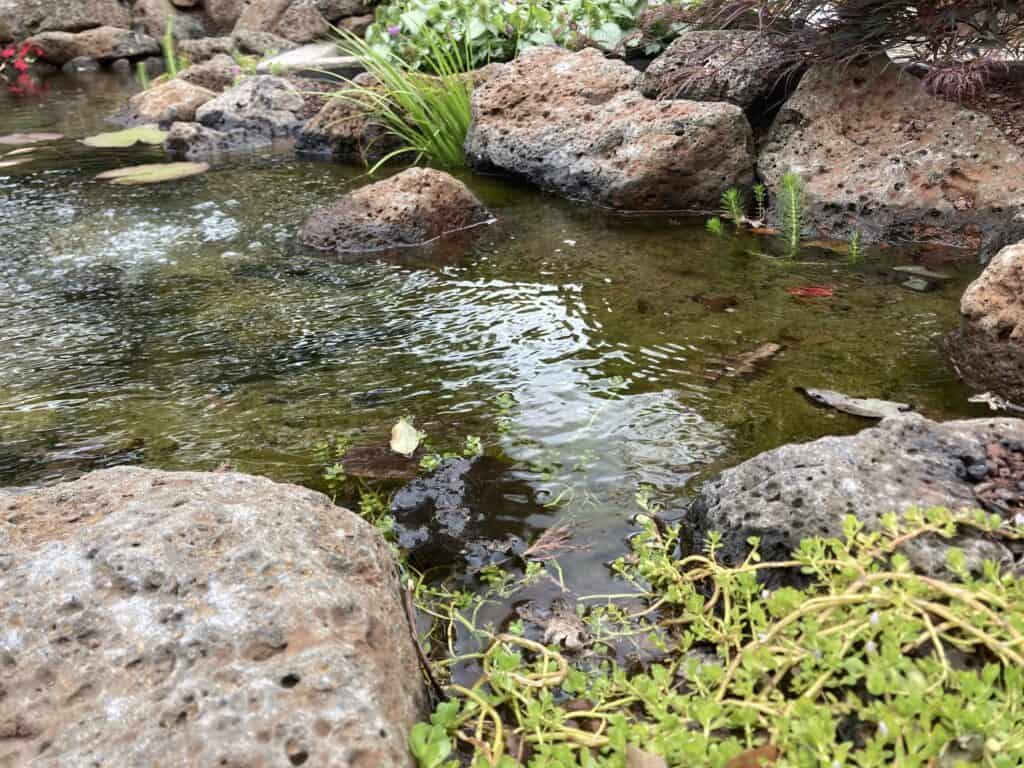
Should you add rocks and pebbles to the pond?
Yes you should! In my humble opinion.
Rocks and pebbles increase the surface area available for the nitrifying bacteria and micro organisms.
These tiny workers are going to help keep the water clear and clean.
You will still need a good biological filter. As I mentioned a bog filter is the best filter you can get and its easy to build yourself.
Using a strong, flexible liner made from EDPM rubber in conjunction with rocks and pebbles allows so much creativity in design and functionality.
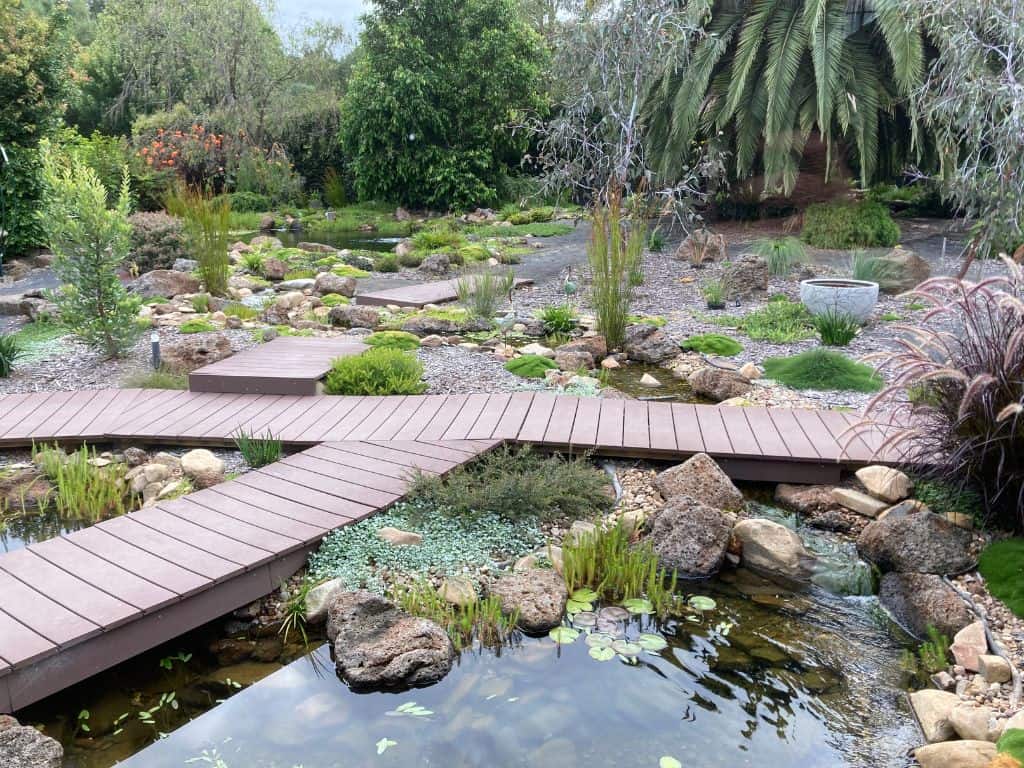
There is nothing better than a pond that looks completely natural.
Rocks and pebbles protect the liner and provide lots of areas for fish to hide and breed.
Pond Circulation
Having good pond circulation is a must if you want to create a low maintenance pond.
The first thing to do is position your biological filter and skimmer/ pump on opposite sides of the pond.
This will create a strong main current.
If the pond has an irregular shape it is wise to incorporate jets or aerators to push the water out of stagnant zones.
This is where I have found small solar pumps to be incredibly handy.
By placing the pump directly into the stagnant area you can direct the flow towards the skimmer.
You can also oversize the main pump and use extra hose and diverter valves to push water out from the sides of the pond, again you want to direct the flow towards the skimmer.
Having some of the jets along the bottom of the pond helps keep any debris suspended. Then it can be collected by the skimmer.
Positioning jets close to the surface is useful in shallow zones. It will prevent the water from getting too warm.
Warm shallow zones are places where algae will most likely grow.
Lighting
Adding lights to the pond will greatly enhance your enjoyment.
They will also attract insects which the fish will feed on. There are solar lights (Amazon link) that are great for this purpose.
But if you want to be able to light up the entire pond you will need to use some low volt lights connected to a transformer.
Low volt pond don’t consume very much energy at all. A 3 watt pond light is very bright and will light up a decent area.
Allow for one 3 watt light per square metre. So a 3m x 4m pond only needs 3 lights to totally light it up.
You can purchase a timer or photocell to turn the lights on automatically.
A timer will turn the light on and off at a certain time every day.
The photocell will turn the light on at dusk and off at dawn.
Low volt pond lights are very easy to install yourself.
When you position the lights face them away from where you sit.
On large ponds with heavy rocks consider adding some tubing or conduit to run the wires through. This way if a light needs replacing you wont need to remove any rocks.
Pond edge treatments
Before you completely cover the liner fill the pond completely and leave it running for a week.
Check for any wet spots where the liner may be low. Once you are happy that no water is escaping you can dress it up nice.
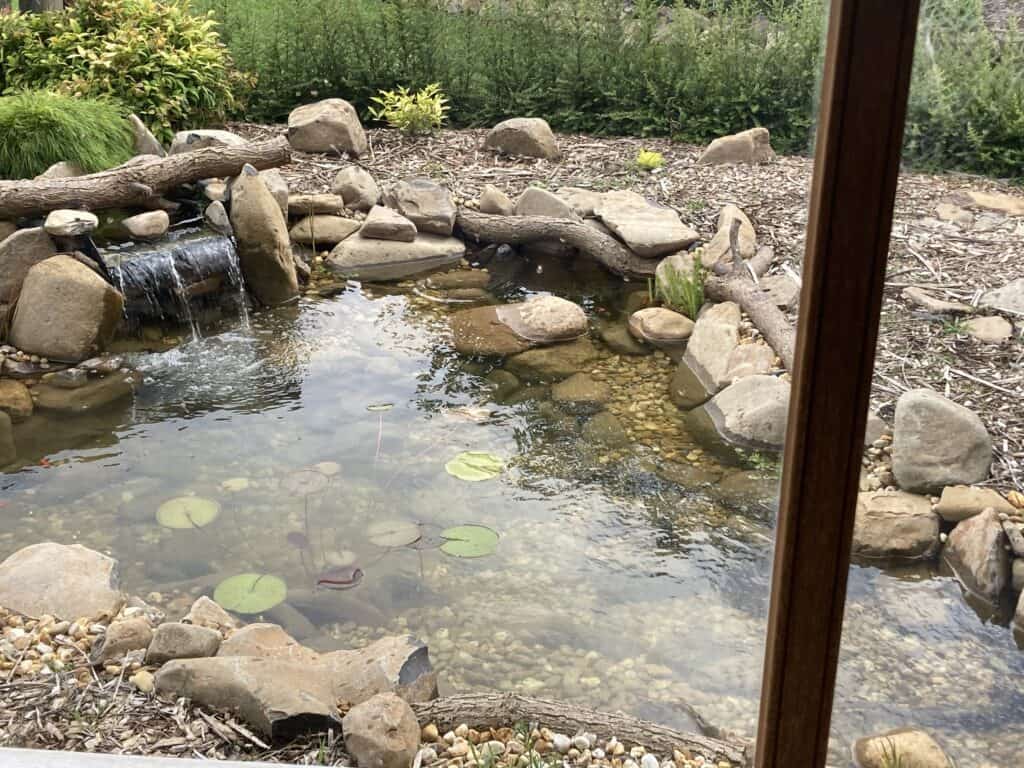
Once upon a time pond edging consisted of a ring of stones pinning the liner down. Nowadays pond builders have gotten much more creative.
When creating a natural looking pond I like to add many different edge treatments to the pond to create that natural look.
First off when using rocks to hide the liner, I like to use large have rocks. Kids are going to jump from rock to rock around the edge of the pond. They can’t help it.
To fill in the gaps between the large rocks use different sized pebbles. This will look better than using all the same size.
Utilise trailing plants. They can be aquatic, terrestrial or a mixture of the two. Plants will blur the line of where the water starts and stops. It adds mystery!
Stumps and logs are usually found in natural ponds, so we should incorporate them in our own ponds. Lock them in place nice and tight with large boulders.
Avoid bringing soil into contact with the water. If the soil and water are in contact water will ‘wick’ out of the pond. This is probably the most common pond leak.
Design Your Pond Using The Same System I Use
- A simple system that has helped people around the world design clear, low-maintenance ponds without spending a fortune.
- Includes access to the Private Ozponds community and Virtual Kev, a tool that helps you plan your pond step-by-step.
Selecting Pond plants
Selecting the right pond plants will help the pond look and function properly. Planting the wrong plant in your pond will cause headaches later.
There are 3 main planting areas in the pond:
- Shallow marginal zones 15cm or less
- Deeper water 30cm or more
- The surface
Shallow marginal plants tend to only like their roots submerged. That is all or the majority of their foliage is above water level.
These types of plants are excellent at removing nutrients from the water. They will provide good shelter for fish fry and tadpoles.
When planting out the shallow margins I like to use taller plants near waterfalls. Smaller clumping plants look great softening rocky outcrops. Trailing plants are perfect for blurring the lines between land and water.
Think about your viewing areas when planting out these shallow plants. You don’t want to screen out the best views.
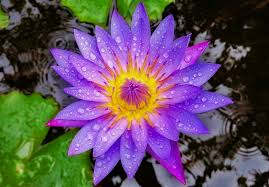
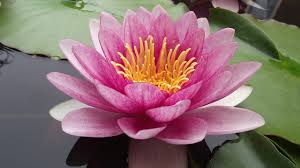
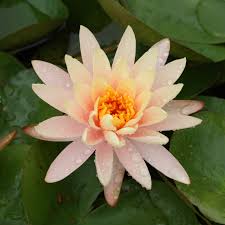
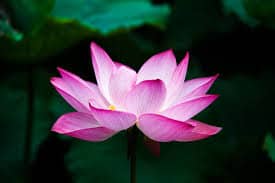
Deep water plants are underwater varieties, as well as lotus and water lilies.
Submerged plants will add oxygen to the water. They provide habitat and shelter for lots of aquatic life.
Lotus and water lilies will provide magnificent flowers. They are also quite functional in that they will shade the water during the summer months.
I recommend lotus and water lilies be kept in pots or special baskets. If left unchecked they can take over a pond.
Floating plants are incredibly fast growing. For this reason they are excellent nutrient sponges. But they can also get out of control.
Duckweed and azolla can be a nightmare to control in larger ponds.
In cooler climates we can grow things like water lettuce without worry that it will take over. Once the first frost comes they die off.
I find it safest to stick with marginals, a few water lilies and some oxygenates.
If you want learn more about specific plants read my article on 40 awesome pond plants.
Adding the fish
I think all ponds should have some fish in them.
The addition of fish helps maintain a well balanced ecosystem. The fish will consume mosquito larvae, graze on algae and keep the nitrifying bacteria well fed.
When you first add fish to the pond it’s wise to do so slowly. First off I like to allow 6-8 weeks for the pond to find some kind of natural balance and harmony.
If there is one thing fish hate its inconsistent water parameters.
So after 6-8 weeks add 2 or 3 fish. If they are small schooling fish you can add up to 6 at a time.
Wait 2-4 weeks if these fish settle in nicely you can add some more. Repeat the process until you have the desired amount of fish.
By adding them slowly it allows the beneficial bacteria to grow to consume the added ammonia that the fish will produce.
If you would like to know how many fish you can keep in a pond read my article “how many fish for my pond?”.
There are lots of fish that are suitable for Australian ponds. Those in the tropics have a huge variety available.
I’m down south near Melbourne so my options are a bit more limited.
In my ponds I have kept: White cloud mountain minnows, southern pygmy perch, murray river rainbows and of course goldfish.
If you would like some ideas of the types of fish you can add to your pond visit my “best pond fish, Australia” article.
Pond Maintenance
If you follow the advice of this article you will find that keeping a pond is very little maintenance.
I have 10 ponds and counting. I spend more time mowing the grass than maintaining my ponds. Of course I spend many hours watching the fish and wildlife interact with the ponds.
This is what my pond maintenance schedule looks like:
| Task | How often | Time it takes |
| Check/ empty skimmer | Once a week | 5 minutes |
| Flush/ clean filter | 2-3 times a year | 5-10 minutes |
| Pump | Once a year | 10 minutes |
| Clean the pond | Once a year | 30 minutes- 1 hr |
Skimmer
So once a week I’ll check the skimmers or intake bays. That involves scooping up a few leaves. While I’m there I’ll rinse out any sponges.
It’s important to remember to rinse the sponges in pond water. If we use chlorinated tap water we can kill the good bacterias living on the sponges.
This takes 5 minutes.
Biological filter
I aim to flush out the filter every 3-6 months. It all depends on how much solid waste is accumulating within the filter.
Every pond is a little different.
Generally I wait until there is a rain event coming. This way nature will replace the water I flushed out to remove the solid materials.
Because I install valves on most of filters this takes less than 5 minutes.
Check the pump
In terms of pump maintenance most manufactures will recommend you check them every 3 months. I’m very lazy and check mine once a year if they are lucky.
Usually I wait till i notice the flow is reduced or there is a noticeable problem. Most often the cage protecting the impeller just need s a good clean.
Sometimes the impeller might need to be removed and cleaned. This isn’t very hard at all. Usually just a twist of the faceplate and the impeller will pop right out. No tools needed.
A wash down of the cage takes 2 minutes. If you need to clean the impeller due to a blockage maybe 10 minutes if that.
Clean the pond
Once a year I manually remove some of the material that has sunk to the bottom of the pond. Even with a skimmer some stuff will accumulate within the pond.
The bacteria will break down a lot of this stuff, just not all.
The best time to do this is in late winter/ early spring. Before everything starts growing.
I just use a pool net or you could invest in a pond vacuum. You don’t need to get the bottom of the pond spotless just remove the stuff that didn’t break down over winter.
As the water warms up the bacteria will kick into action and break down the smaller stuff you couldn’t get.
This takes 30min- an hour.
Cost to build a pond
The 3 most expensive things you need to build a pond are:
- The liner or container
- Rocks and pebbles
- Submersible pond pump
Then you’ll need assorted plumbing fittings and hoses.
For good quality EPDM rubber liner your looking at $22-$25 per square meter. Not cheap I know but its the only liner I will use. I also recommend getting some underlayment to cushion the liner.
Think of this a cheap insurance. Expect to pay between $2-$6 per square meter for underlayment.
For nice rocks expect to pay anywhere from $100-$180 per square metre. Pebbles you can usually get for under $100 although I’ve paid as high as $160 per metre.
If you keep a lookout on marketplace, ebay and gumtree sometimes you’ll find people giving away their unwanted rocks. If you are willing to remove them they are free.
Submersible pond pumps will vary in price substantially. Obviously the more water that is moved the more expensive the pump. Also low volt will cost more than 240volt and the more energy efficient the more expensive also.
A good quality pump for a 3m x 3m pond will cost between $150-$300. Some of my smaller ponds run on cheap $30 pumps.
If you want to hire a mini excavator you’ll be looking at $200-300 for the day plus fuel. Sometimes its easier to hire one with an operator for between $90-$120 an hour.
Of course if your like me and you enjoy digging just roll up those sleeves and get it done!
Design Your Pond Using The Same System I Use
- A simple system that has helped people around the world design clear, low-maintenance ponds without spending a fortune.
- Includes access to the Private Ozponds community and Virtual Kev, a tool that helps you plan your pond step-by-step.
Lastly you will need some other assorted bits and bobs like containers or extra liner for the biological filter, assorted plumbing etc. Because this is such a variable it’s impossible to accurately estimate.
The table below gives some ideas on what you can expect to pay for various sized ponds. I’ve included prices for contractor built ponds, DIY ponds using available pond-kits and everything put together totally DIY.
insert table.
| Size | Contractor built | DIY using pond kit | Complete DIY |
| 1.2m x 1.8m | $4000-$6000 | $2000-$2500 | $400-$1000 |
| 2.4m x 3.3m | $8000-$10000 | $2800-$4500 | $1500-$2000 |
| 3.3m x 4.8m | $14000-$16000 | $6000-$8500 | $2000-$3000 |
| 6.4m x 7.9m | $20000-$26000 | $10000-$14000 | $5500-$7000 |
The prices for contractor built are calculated using aquascape certified contractors.
Pond kit prices are based on aquascape pond kits available through their website.
The complete DIY ponds are based on how much it would cost for all the components (homemade skimmers, filters, etc.) to build a pond that size.
All prices are using good quality EPDM rubber liner, High flow energy efficient pumps, Rocks and gravel, Biological filters, Skimmers and assorted plumbing.
Plants and extra landscaping are not included.
About to build a pond… or already have one?
Sign up for my email list and I’ll send you DIY-friendly pond tips, along with a few helpful tools like calculators, gear recommendations, and more.
I hope this article has been helpful, along with the links, videos and other articles. Remember if you would like to get the downloadable pdf with the formulas I use when building my ponds you can find that here.
Good luck with your pond build!