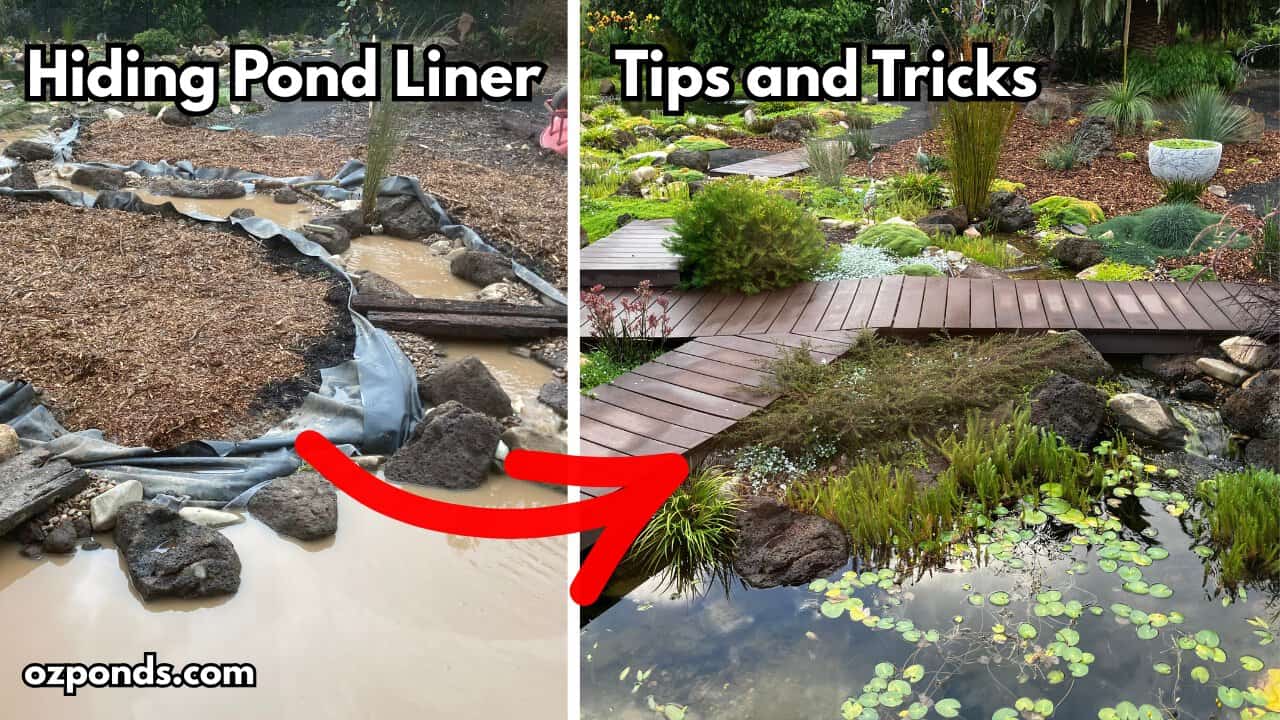
When someone builds their first pond, they usually spend weeks planning the waterfall, choosing fish, and picking aquatic plants.
Then they fill the pond with water…
…and suddenly all they can see is black liner around the edge.
It’s one of the most common questions I receive.
“Kev, how do I hide my pond liner?”
The good news is there isn’t just one right way to finish a pond.
Whether you’re building a wildlife pond, koi pond, preformed pond, stock tank pond or a formal courtyard pond, the same basic principles apply.
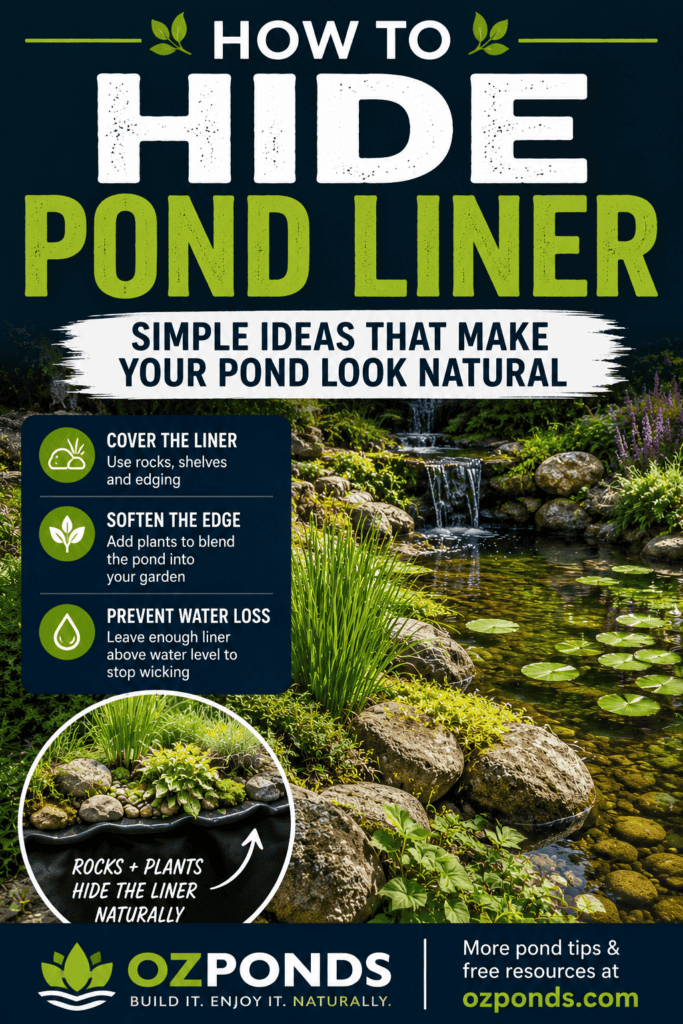
After building ponds for many years, I’ve found that every successful pond edge comes down to three simple goals:
- Cover the liner.
- Soften the edge.
- Prevent water loss.
If you can achieve those three things, you’re usually on the right track.
My Favourite Method: Shelves, Rocks and Plants
Whenever possible, I dig ponds with shelves.
These shelves create stable areas where rocks can sit safely while also providing planting areas for marginal aquatic plants.
The rocks form the structure.
The plants soften everything.
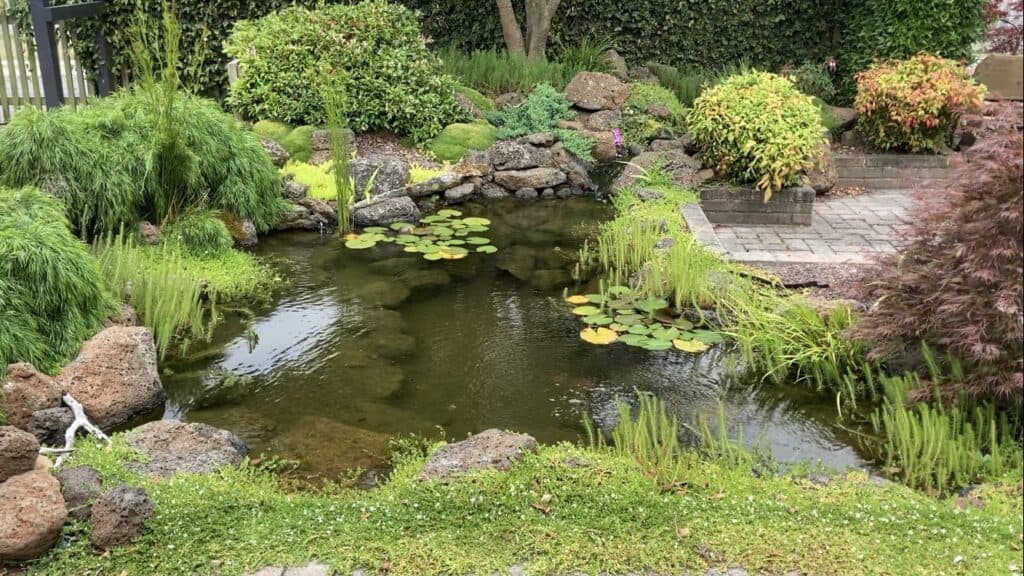
Over time the plants become the star of the show and most of the rockwork almost disappears into the landscape.
Nature rarely creates perfect circles of identical rocks, so I like mixing different materials together:
- large boulders
- smaller rocks
- pebbles
- old logs
- timber
- tree stumps
- plenty of aquatic plants
The result feels much more natural than repeating the same edging material all the way around the pond.
You Don’t Need Large Shelves
Many people assume pond shelves need to be wide.
They don’t.
Sometimes a shelf only needs to be deep enough to support your edging material.
For example:
If your edging rock is about 30 cm (1 foot) tall, a shelf only 15 cm (6 inches) deep may be enough.
The rock sits half in the water and half out.
The liner comes up behind the rock before being backfilled with soil.
The exact material doesn’t matter.
The same principle works with:
- natural stone
- timber
- brick
- concrete edging
- retaining walls
- logs
The shelf simply gives everything somewhere stable to sit.
Plants Usually Do More Than The Rocks
One thing I’ve noticed over the years is that people often focus on the rocks.
In reality, the plants usually do most of the work.
Marginal plants blur the line between land and water.
Ground covers soften hard edges.
Shrubs create focal points.
Aquatic plants also improve water quality by absorbing nutrients while creating habitat for frogs, dragonflies and other wildlife.
The pond becomes part of the garden instead of looking like a hole lined with rubber.
Watch Out for Pond Wicking
One of the biggest causes of mysterious water loss is something called wicking.
Wicking happens when water is slowly pulled above the pond’s water level through materials such as:
- moss
- plant roots
- soil
- dead leaves
- landscape fabric
- porous rocks
Eventually that moisture can escape into the surrounding garden.
Many people assume they have a leak when the real problem is simply water being wicked over the pond edge.
That’s why I always leave more liner above the water level than I think I’ll need.
Keeping the liner higher helps ensure any wicking stays inside the pond instead of draining it.
Can You Use Wicking to Your Advantage?
This is something I’ve never properly experimented with, but I think it’s an interesting idea.
Sometimes ponds have exposed liner above the waterline because the water level naturally settles lower than the edging rocks.
Instead of hiding it with more rock, I wonder whether deliberately encouraging a little controlled wicking could actually help.
For example, a strip of non-woven geotextile fabric could keep the liner damp enough for moss or moisture-loving groundcovers like Baby’s Tears to establish.
Rather than seeing black liner, you could end up with a living green edge.
It’s only a theory at this stage, but it’s something I’d like to test in the future.
Just remember that more wicking usually means:
- more evaporation
- more topping up
- greater chance of nutrients moving into the pond
Like many things in pond building, there are trade-offs.
Beach Entries Can Look Fantastic
Not everyone wants shelves.
Some people prefer a gentle beach entry.
The same basic rules still apply.
Leave plenty of liner above the waterline and make sure the beach material is properly retained.
Sand generally requires a gentler slope than gravel or pebble.
If I were building a true beach, I’d protect the liner with geotextile underlay and probably use a cellular confinement grid to stop the material gradually sliding into the deeper water.
Even if your pond isn’t a full beach, mixing gentle slopes with traditional shelves often creates a more natural appearance.
Design Your Pond Using The Same System I Use
- A simple system that has helped people around the world design clear, low-maintenance ponds without spending a fortune.
- Includes access to the Private Ozponds community and Virtual Kev, a tool that helps you plan your pond step-by-step.
What If Your Pond Doesn’t Have Shelves?
Many existing ponds were built with steep sides.
Fortunately, shelves can usually be added later.
Some options include:
- building shelves with sandbags
- backfilling sections of the pond
- reshaping the pond during a liner replacement
- creating internal plant shelves
The important thing isn’t the method.
It’s understanding what the shelf is doing.
Shelves create stable areas for rocks, plants and edging materials.
Ponds Beside Walls, Decks and Patios
Formal ponds often don’t suit traditional shelves.
For one of my courtyard ponds, I wanted deep water right beside the sitting area.
Instead of building shelves, I dug straight down before constructing a small rock retaining wall inside the pond itself.
On another project, expanding foam helped secure rocks around a waterfall.
For larger retaining structures, however, I’d recommend proper retaining wall construction and engineering advice.
Whenever structures become involved, it’s worth doing the job properly.
Hiding the Edge of Preformed Ponds
Preformed ponds and stock tank ponds follow exactly the same principles.
You still want to soften the transition between the pond and the surrounding garden.
You can do this with:
- rocks
- timber edging
- aquatic plants
- surrounding garden plants
- feature boulders extending into the landscape
Inside the pond, you might choose:
- gravel
- rock
- aquatic plants
- dirt and sand substrate
Or if you prefer open water, painting the inside black often helps the container visually disappear.
Over time, algae, biofilm and natural weathering usually soften these surfaces anyway.
Nature does a lot of the work if you’re patient.
You Don’t Always Need to Completely Hide the Liner
One of my small formal ponds uses timber edging that slightly overhangs the water.
The shadow hides most of the liner.
The liner is still there.
Your eye simply doesn’t notice it.
Sometimes the goal isn’t making the liner disappear completely.
Sometimes it’s simply making it stop drawing attention to itself.
My Final Tip Before Finishing Any Pond
Whenever I build a pond, I leave the liner exposed for a while before permanently installing the edging.
Why?
Because it’s much easier to identify:
- low edges
- liner folds
- potential leaks
- wicking problems
Once I’m confident the water level has stabilised and everything is working properly, then I’ll permanently hide the liner.
It saves a lot of frustration later.
The Best Pond Edges Combine Different Materials
After building many ponds, I’ve found the best-looking pond edges rarely rely on one material.
Instead, they combine:
- rocks for structure
- plants for softness
- timber for warmth
- natural textures that blend into the surrounding landscape
As the pond matures, nature gradually takes over.
The plants grow.
Biofilms develop.
Everything begins to blend together.
That’s when a pond really starts to look like it belongs.
Frequently Asked Questions
How do I hide pond liner naturally?
The easiest method is to combine rocks with aquatic plants. Rocks hide the liner while plants soften the edges and help the pond blend into the surrounding garden.
Why is my pond liner still visible?
Usually the water level has settled lower than expected or the edging materials aren’t large enough to hide the liner. Sometimes simple timber edging or additional marginal plants can make the liner much less noticeable.
What is pond wicking?
Wicking occurs when water is pulled above the pond water level through soil, moss, roots, fabric or porous rocks. It can slowly drain water from the pond and is often mistaken for a leak.
Can I add shelves to an existing pond?
Yes. Existing ponds can often be modified using sandbags, backfilled areas, artificial shelves or by reshaping the pond when replacing the liner.
Do all ponds need rocks around the edge?
No. Formal ponds may use timber, brick or concrete instead. The important goal is creating a clean transition between the pond and the surrounding landscape while preventing water loss.
About to build a pond… or already have one?
Sign up for my email list and I’ll send you DIY-friendly pond tips, along with a few helpful tools like calculators, gear recommendations, and more.