
If you’ve got ducks (or you’re planning to get some), one thing becomes clear pretty fast:
Ducks are messy.
They poop in the water. They dig. They trample plants.
And they’ll turn a small, stagnant pond into a stinky swamp if you’re not careful.
So today, I’m going to show you how I would design a pond specifically for ducks — with two different approaches:
- A cheap, small-space option
- And a dream pond setup that’s low-maintenance and looks amazing
💰 Option 1: The Cheap & Quick Duck Pond
If you’re short on space (or cash), this option works well — as long as you understand it’ll need regular cleaning.
🛠️ Basic setup:
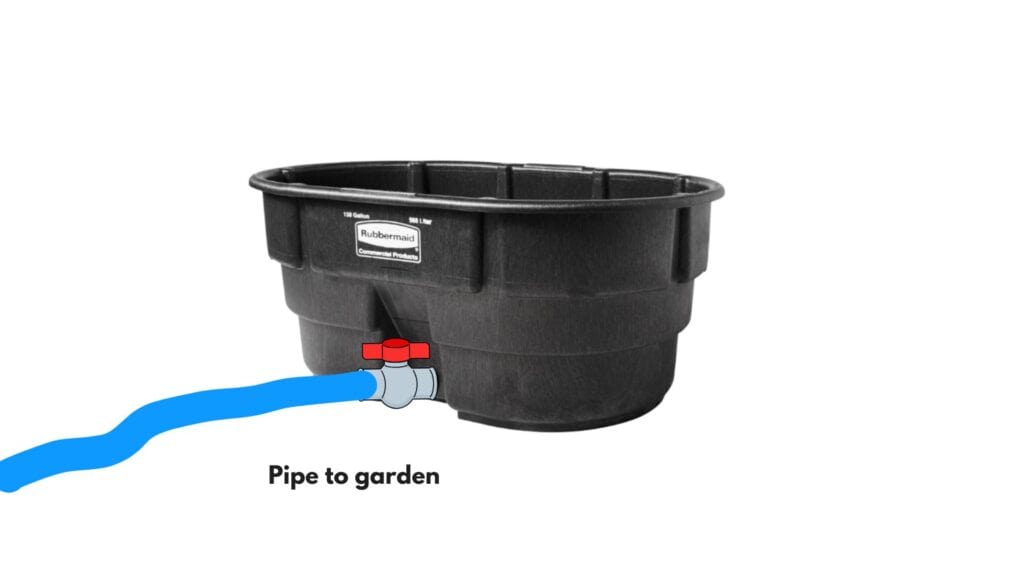
- A plastic tub or trough (as big as you can manage)
- A bottom drain or valve to make water changes easy
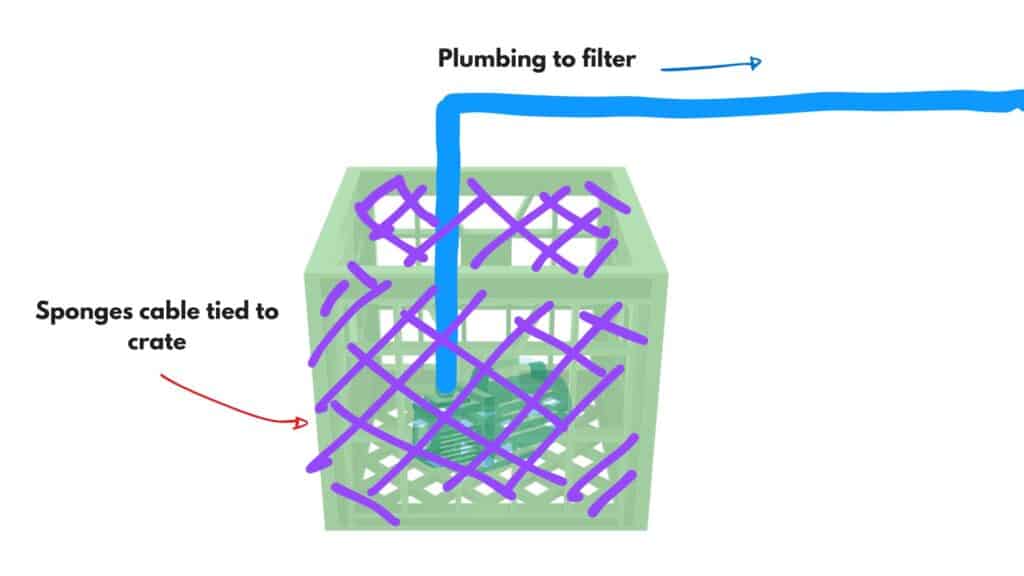
- A simple mechanical filter packed with coarse sponge (Matala or JapMat)
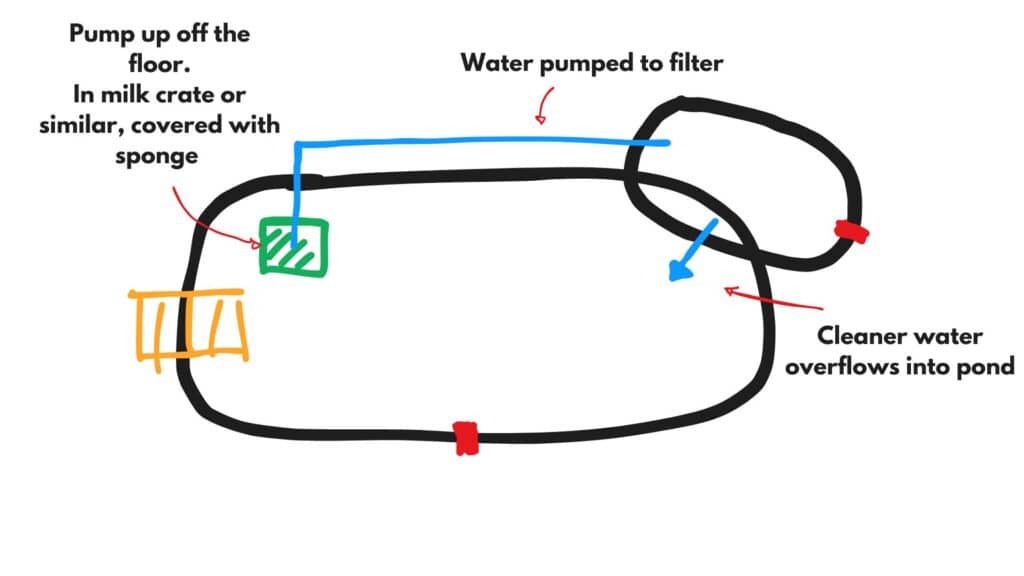
- A low-voltage pump circulating the water 24/7
- The pump sits inside a milk crate, surrounded by sponge to stop clogs


This setup accepts that you’ll need to do water changes and filter flushes weekly (or fortnightly if you’re lucky).
But it’s simple. Takes 15–30 minutes to maintain.
And the waste water? Perfect for the veggie garden.
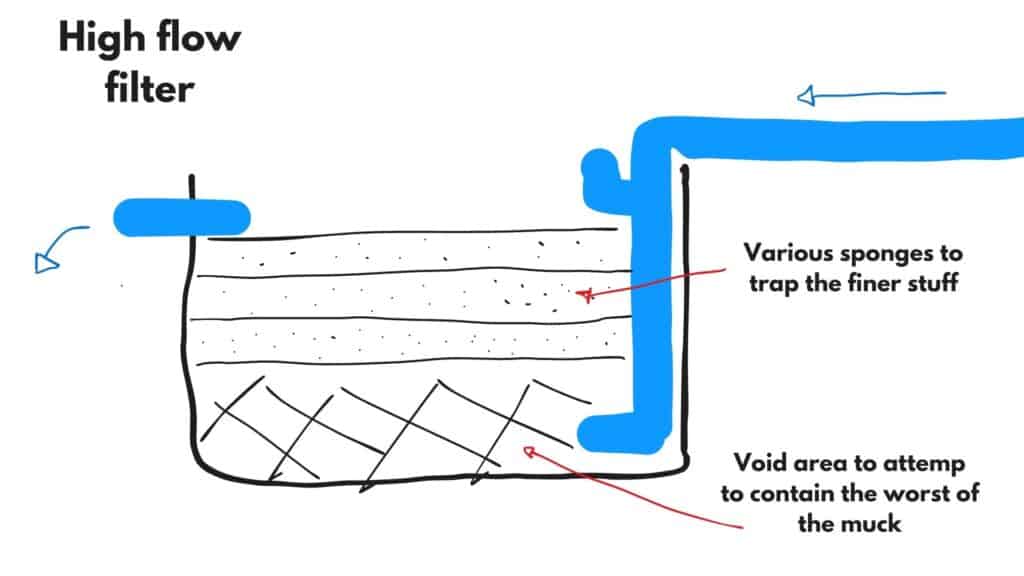
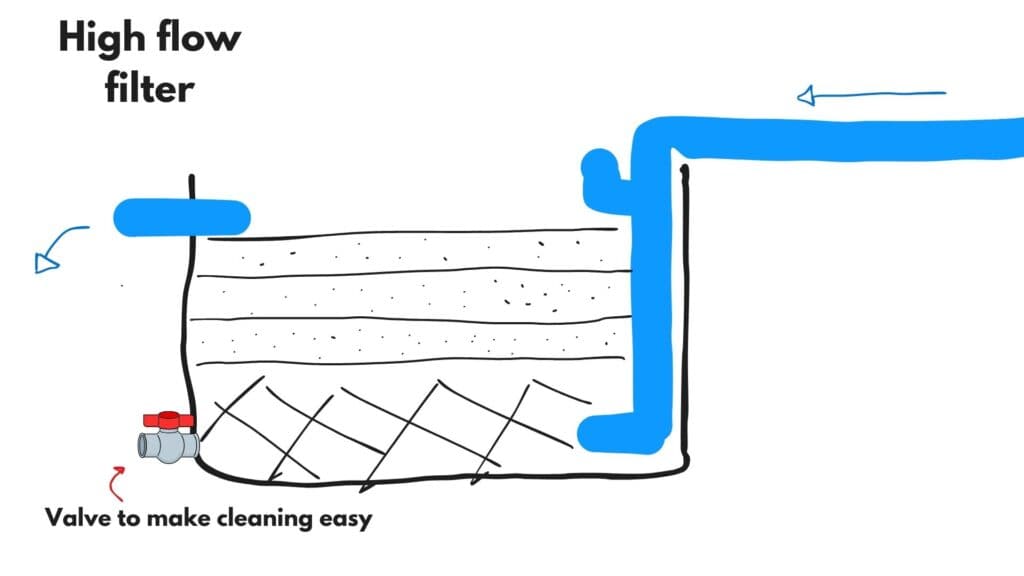
🧽 Duck pond filters aren’t about fancy tricks — just get rid of the sludge.
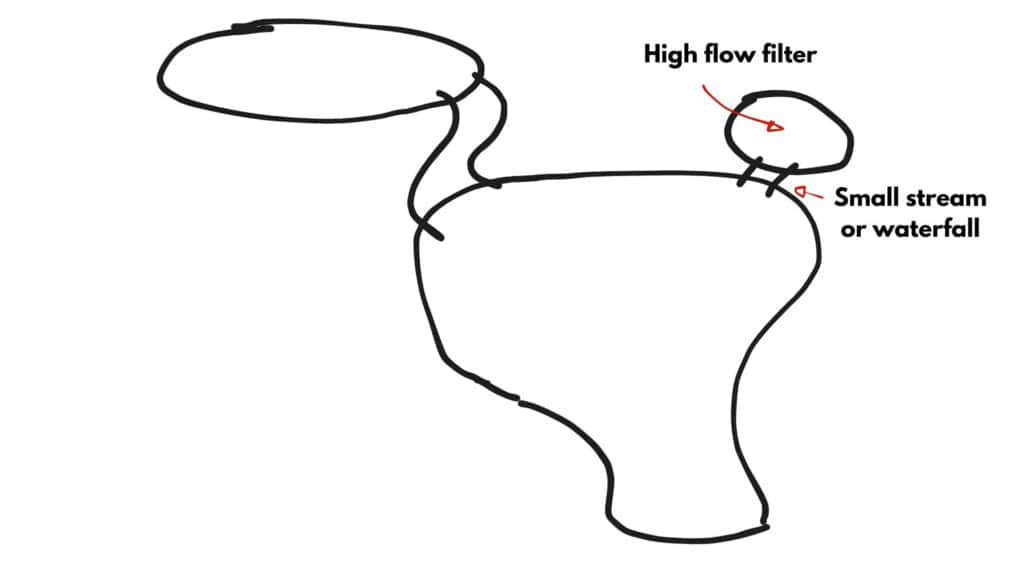
✅ Filter tip: Choose a high-flow filter that’s easy to clean. You’ll be using it a lot.
✅ Pump tip: Don’t sit your pump directly on the bottom. Let gravity and the bottom drain deal with the worst of the muck.
🌿 Option 2: The Proper Duck Pond (My Dream Setup)
Got space? Bit of budget? This is where it gets fun.
You can build something beautiful and easy to maintain if you size it right.
Ideal Duck-to-Water Ratio:
🦆 1 duck per 5,000L (about 1 duck per 1,300 gallons)
That gives the waste somewhere to go — and makes your life easier.
🔧 Key features:
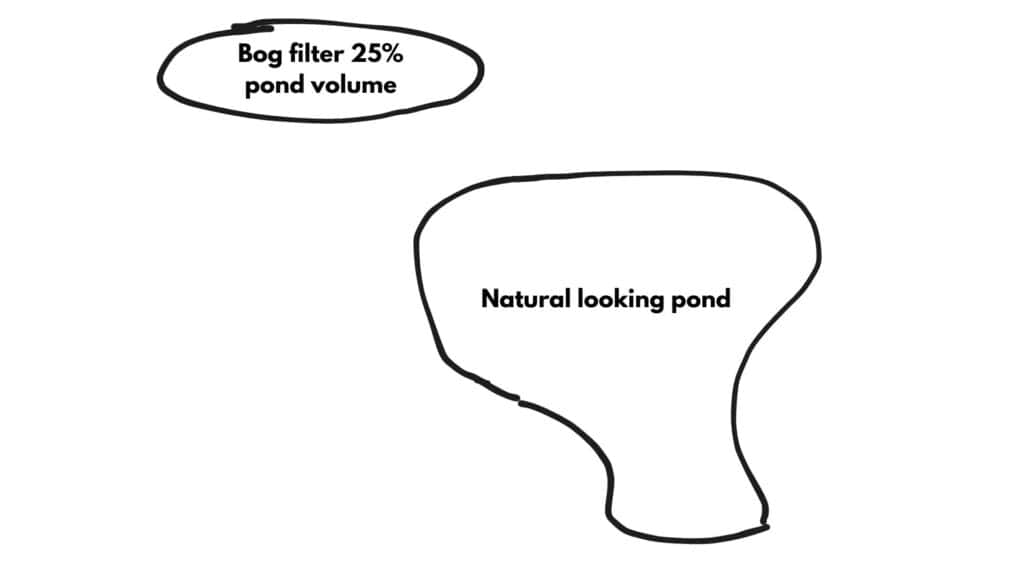
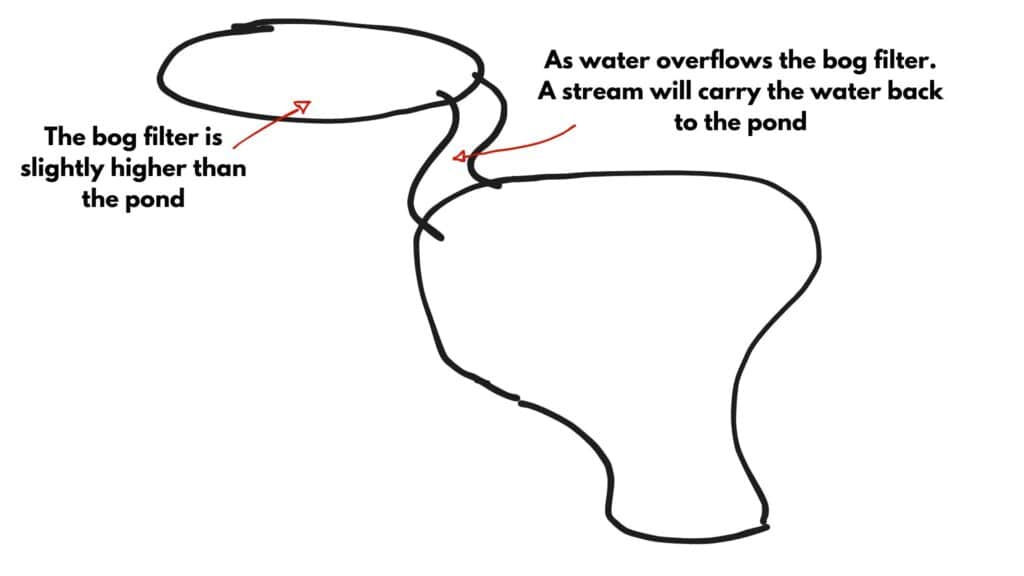
- Bog filter: Sized at 20–25% of pond volume
- Dedicated mechanical filter: Same principle as the cheap setup — sponges + easy flush
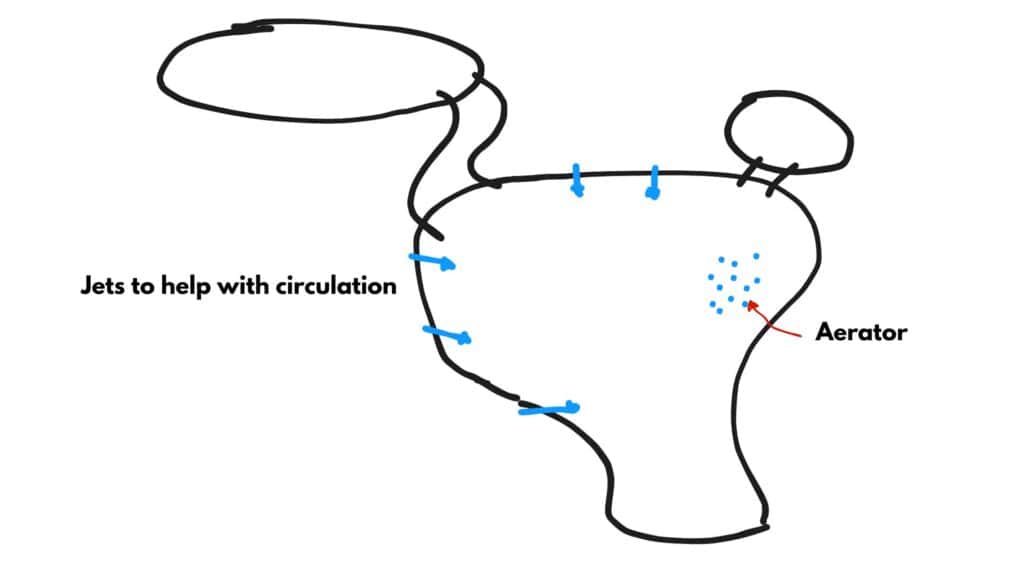
- Circulation jets to prevent dead zones
- Aerator for oxygen
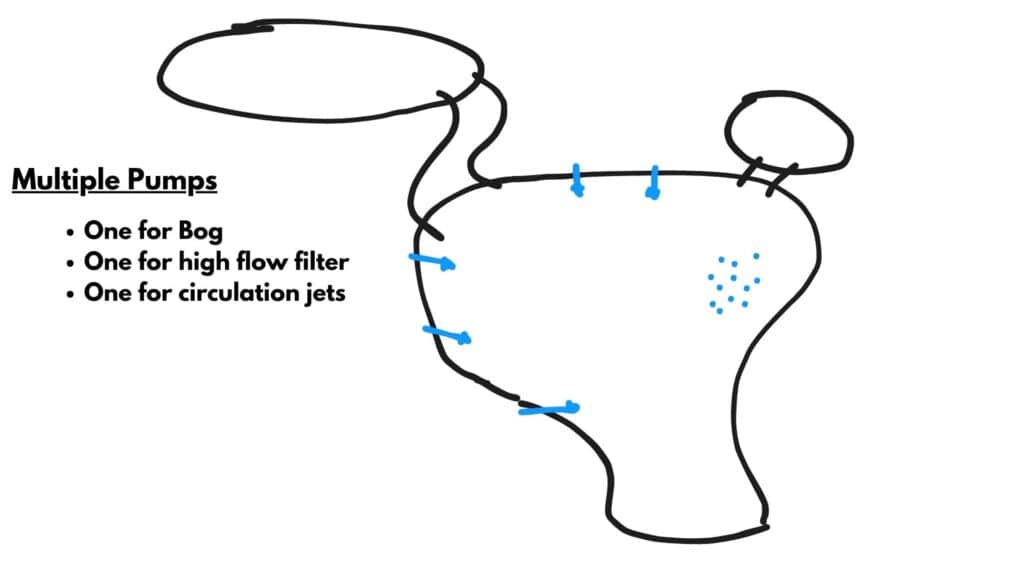
- Multiple pumps: One for the bog, one for the jets, one for the mechanical filter
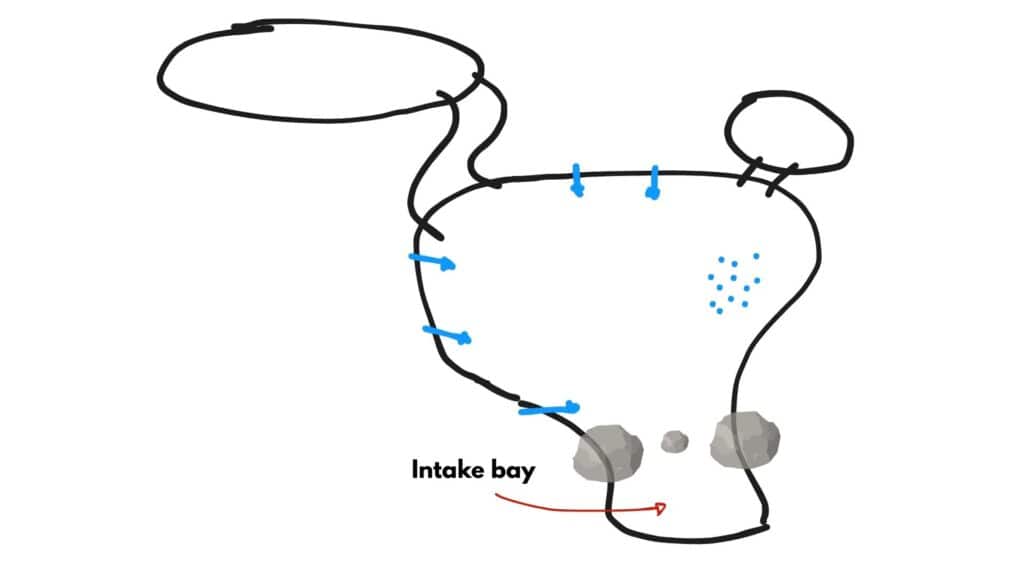
- Pumps in intake bay or negative edge reservoir (keeps them clean, reduces maintenance)
- Natural layout: Deep zones, shelves for rock placement, pebble substrate
- EPDM rubber liner + geotextile underlayment (don’t skimp here — it’s your biggest expense)
The pebble will get a bit mucky over time, but that’s okay — it protects the liner, builds surface area for bacteria, and creates hiding spots for little critters.
You will need to give the pond a vacuum or use a muck lift treatment from time to time.

📐 How Do You Know What Size Everything Should Be?
I use my Pond Formulas Blueprint. It includes:
- A complete system for designing your perfect pond
- A guide on how a pond ecosystem works (so you can work with nature)
- Access to a private community of hundreds of other pond builders following the same system.
- A ‘Virtual Kev” to help with calculations and troubleshooting.
🧼 Final Thoughts
Whether you’re going cheap or going all out —
The goal is the same: keep the water moving, remove the waste, and give your ducks enough room to do their thing.
The bigger the pond, the easier it is to manage.
But even a small pond can work — as long as you design it with maintenance in mind.
🎥 Want to Watch the Full Walkthrough?
Check out the full video on YouTube where I explain both setups, step-by-step:

Join my free email list
If you would like to join my free email list click the button below.
I promise I won’t spam you, I’ll only send information I think can help you save money building and maintaining a pond.