
Pond filters are a must for those of us who love keeping fish in our ponds.
There are numerous commercially available filters. But if you’re like me, you want to save a buck and build you own.
Theres many designs for diy pond filters but for me most of them were ugly and didn’t blend in with the pond.
I like natural looking ponds. I do have a downloadable pdf that contains all the formulas and calculations I use when constructing my ponds, if you’re interested.
I wanted something that was athletically pleasing and easy to maintain (as in almost zero maintenance).
My ponds are for enjoyment, I want to relax. I don’t want to create more work for myself.
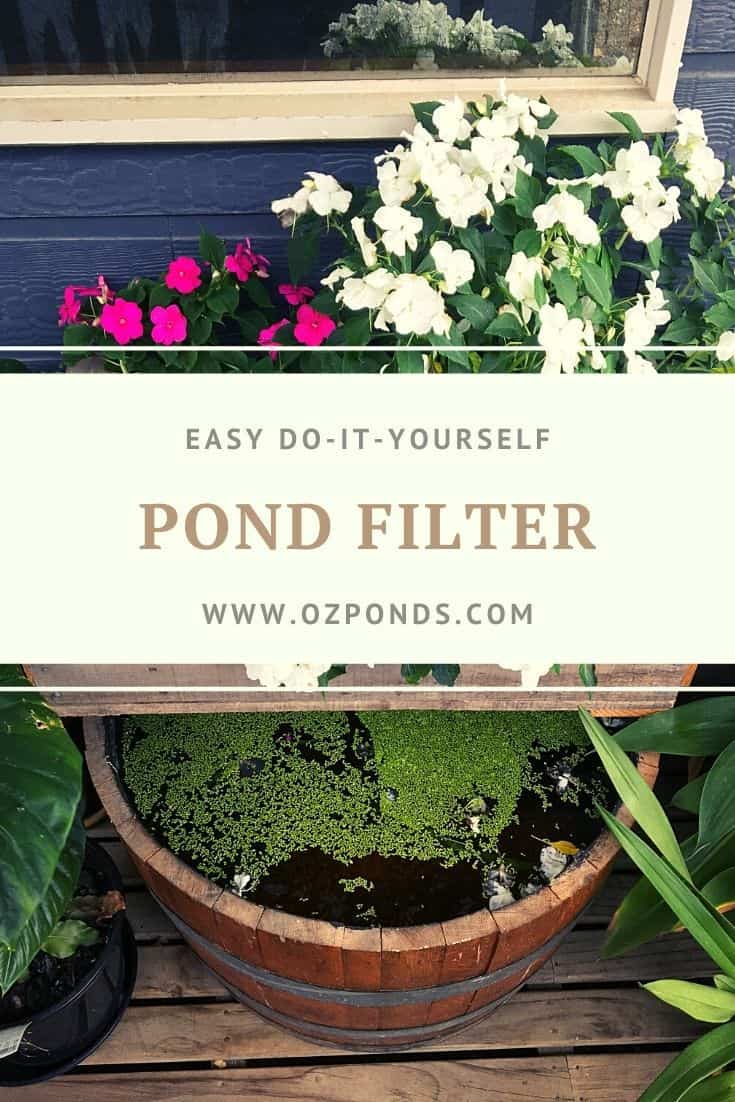
The pond filters I build are known as bog or wetland filters.
They are cheap! Easy to make and incredibly effective at keeping a pond clean and clear. Best of all these filters use mother nature, making them very easy to maintain.
Blueprint I use to build my ponds
- All the numbers I use to design my ponds, delivered straight to your inbox
- These formulas have helped people all over the world build beautiful, low maintenance ponds, without spending a fortune.
- Access to a private community of like minded people and a chat bot that loves answering pond related questions.
Equipment needed to create a bog filter
The first thing you’ll need to know is what materials we use for our DIY wetland or bog pond filters.
- Container or pond liner for the filter. If using a container select something that is UV stabilised and food grade.
- PVC pipe sized slightly larger than what is recommended for the pump in the pond.
- Bulkhead fittings or uni-seals. These are used to make a water tight seal in the container or liner.
- Drill. With different sized drill bits and a a hole saw.
- Assorted plumbing fittings. On small filters I like to incorporate a valve to flush out solids. You’ll also need some elbows, caps etc… The fittings will vary from project to project. It’s a good idea to draw a sketch of the system so you don’t forget something.
- Different sized rocks from the size of a melon down to about 3/4 inch.
- Some water plants.
- Something that can be used to create a void space at the bottom of the filter. This could be a large slotted pipe, aquablox, old pots whatever get creative.
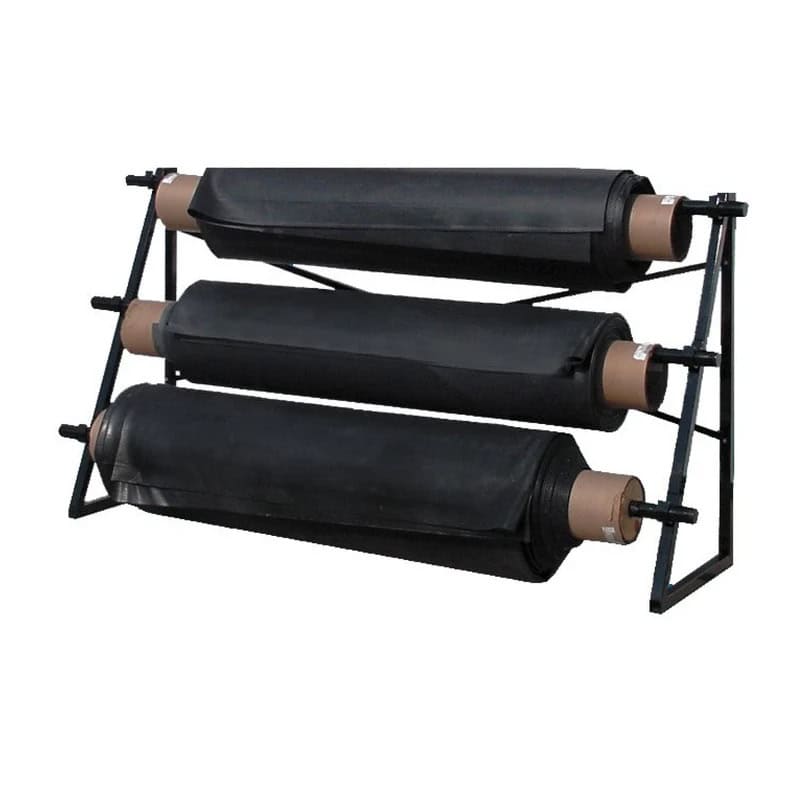
Pond Equipment in Australia
I’ve partnered up with Rock Around The Block, a leading pond retailer here in Australia. There is a discount code: OZPONDS
They stock high quality Liner, Underlayment, Pumps, Lightning and more. Click the button below to check out their range.
DIY Pond filter for small ponds
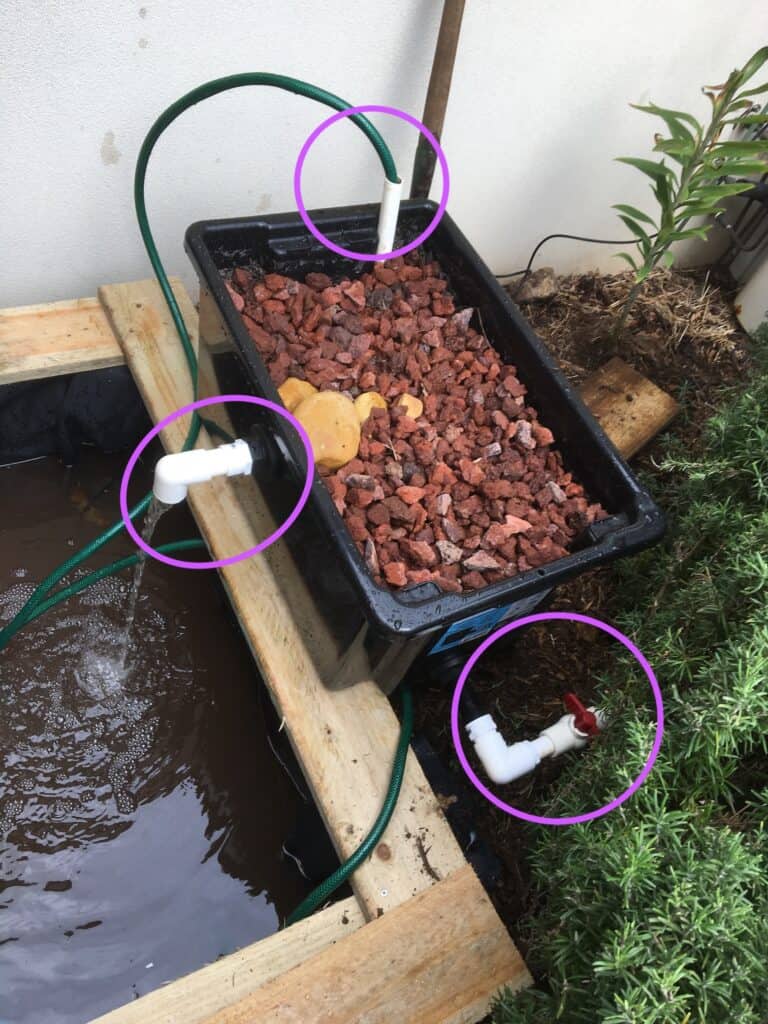
For small ponds I use larger food safe storage containers.
These are available at any hardware store or online. I find that a container that holds 10% of the overall pond volume adequate.
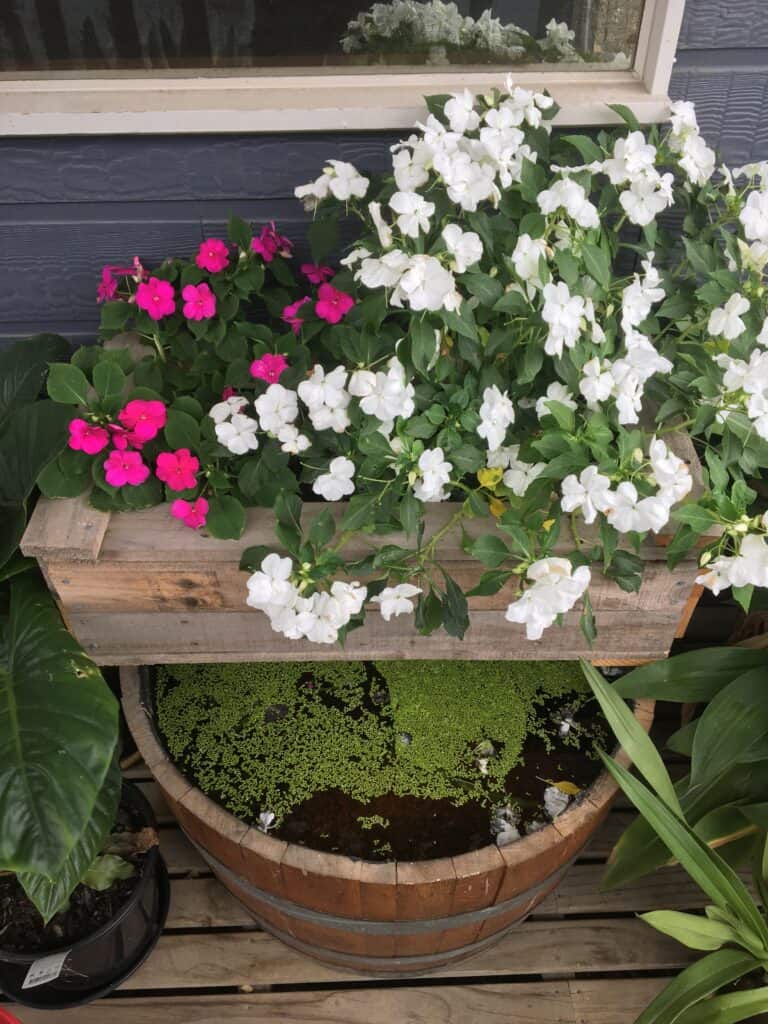
Below is a short video showing how i built a small bog filter for a wine barrel pond.
So for a pond that holds 1000L select a 100L container. You can use multiple containers if necessary.
DIY Pond filter for larger ponds
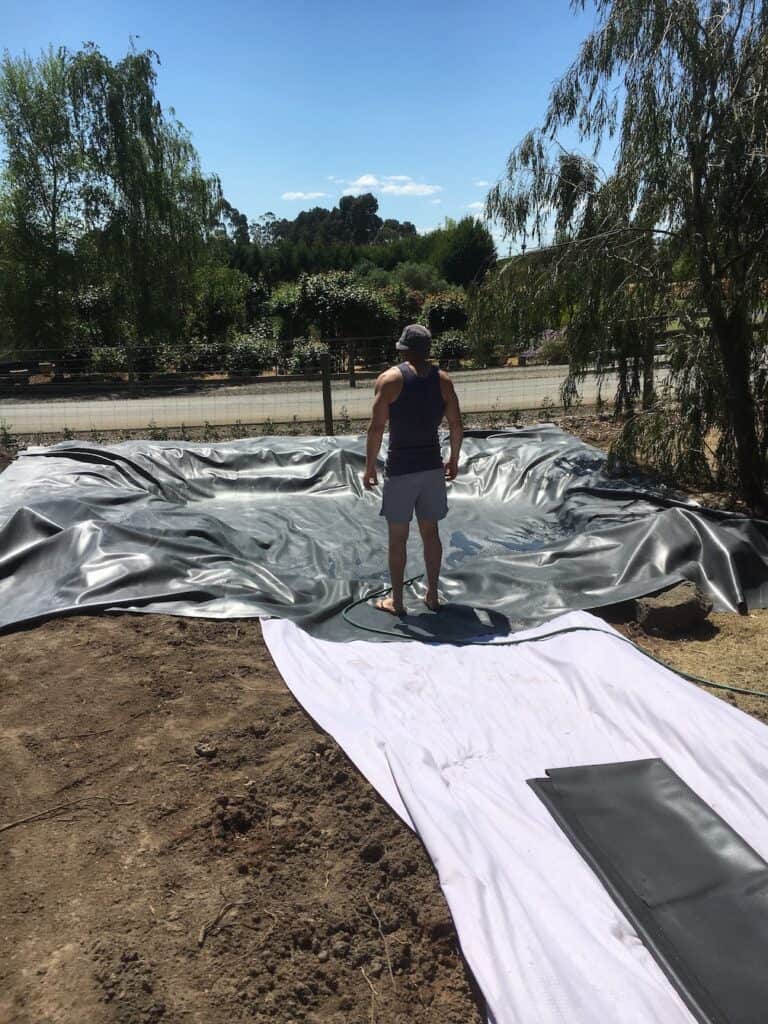
Obviously on large ponds it is not possible to buy a container large enough.
In that case you would simple excavate a hole and use pond liner to create a reservoir that will act as the filter.
The main design principles remain the same just on a larger scale.
10% of volume or surface area is a good starting point. But larger fish loads will require more filtration.
Large fish = More waste = More filtration needed.
Its always better to oversize your pond filter on these larger projects. For larger fish aim for 30% filter to pond ratio.
Below is a video showing how I built a much larger filter for my dream pond.
Swim ponds will need even more aim for 50% filter to pond area.
I know this seems like a large amount of area and it is. But keep in mind these pond filters are natural and living and easily blend into the pond landscape.
You’ll also need an assortment of other bits and pieces, such as pipes, fittings, valves, bulkheads ect. All these will vary depending on the size of the filter and the pump feeding the filter.
I’ll talk more about pipe sizing later.
For the filter to be effective we need it to do 4 things.
4 things needed to create the perfect pond filter
- Remove solids
- Slow water flow
- Provided a home for beneficial bacterias
- Use plants to remove nutrients
Remove solids
An effective pond filter needs to be able to remove solids such as fish waste from the pond. The easiest way is to allow the pump to suck them up and deliver them into the filter.
I always allow the solids to settle at the bottom of the filter.
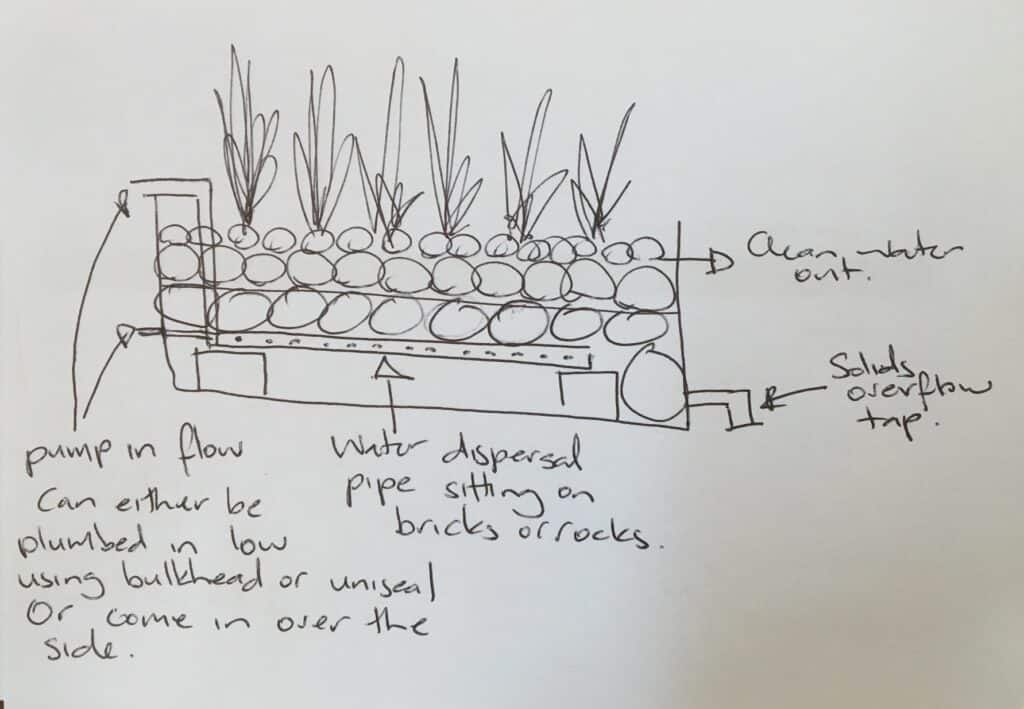
On small systems they can be removed by adding a simple tap. Drill a 25mm(1”) hole as low as possible on the container. Use a bulkhead fitting or uni seal to provide a watertight seal.
Then connect some 25mm (1”) pvc pipe and add a valve. Now you’ve got a tap that can be opened up whenever you want to flush the solids out.
Larger systems we create an inspection port of sorts which can accomodate a sump or clean out pump.
I use 300mm(12”) pvc pipe on the larger projects that are housed within pond liner. This size allows me to fit my sump/ dirty water pump. This can be larger if needed.
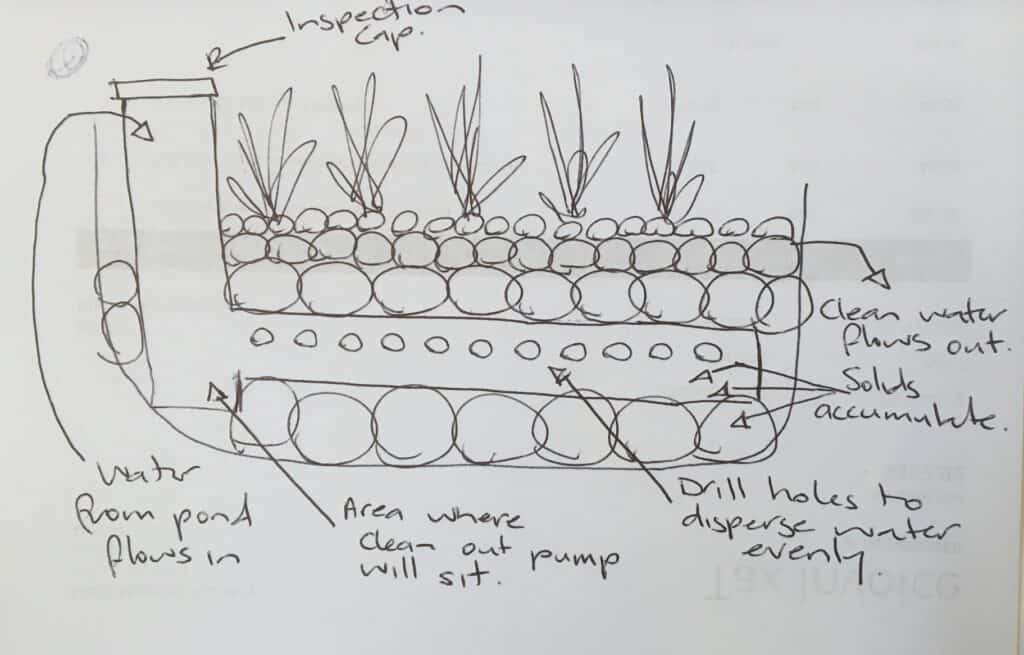
Use a T-piece fitting at the bottom. Extend the pipe down a few inches, so it reaches down as deep as possible. Place an end cap on to seal. This is where solids will accumulate and can be easily pumped out.
The open part of the T is where we will connect the water dispersal pipe. We will talk about this next. This is how the water is slowed and distributed evenly throughout the filter.
Here’s a couple of videos showing how I clean out a few of my different pond filters.
Slow water flow
We need to slow the water flow.
This will allow it to flow evenly up through the filter. The water needs time in contact with the beneficial bacteria.
Remember it is the bacteria that are doing the heavy lifting when it comes to filtering.
This is easy to accomplish.
We want to connect the pipe from the pump into a pipe that sits within the filter. The pipe in the filter will have holes drilled along it to distribute water evenly through the filter.
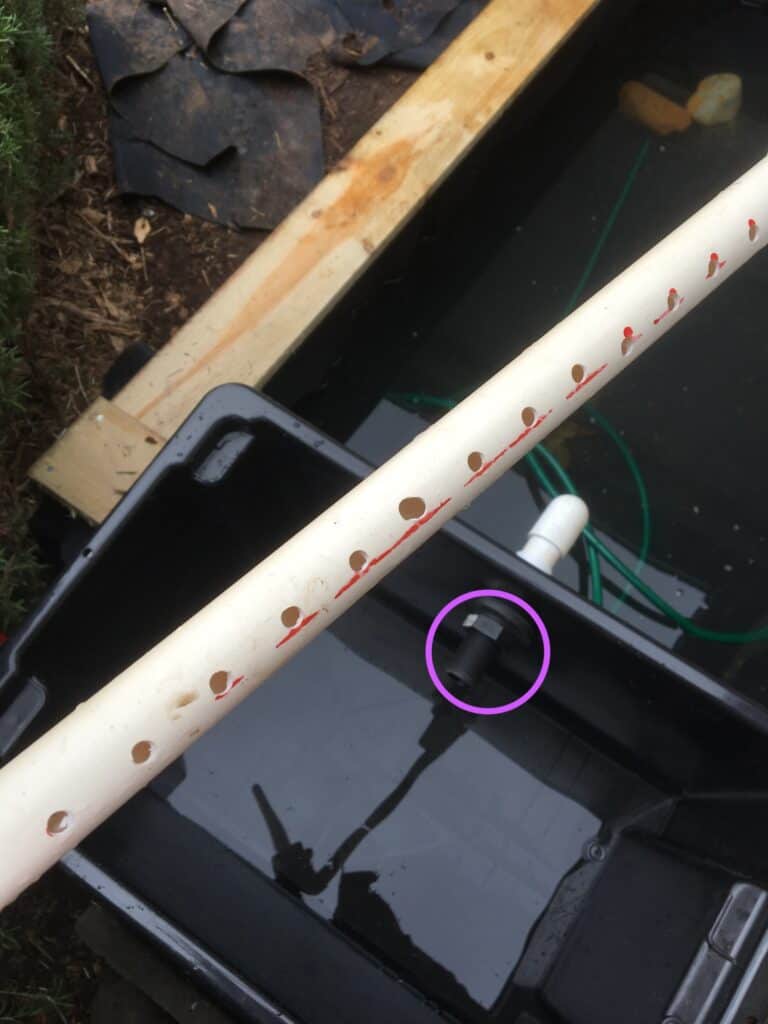
Sit this pipe on some bricks or rocks so it isn’t sitting directly on the bottom of the container. This void is where the solids will accumulate. And be removed via the tap.
When drilling the holes along the pipe keep the spacing nice and even and keep them large enough for the solids to pass through.
On these small systems use trial and error with the hole size. It all depends on the pump volume. Just test it all before you add any rocks and gravel to the filter.
On a piece of 25mm (1 inch) pvc pipe i tend to use an 8mm drill bit.
For the larger systems we do exactly the same thing. We connect a water dispersal pipe into the T fitting and place holes evenly along the length.
Place the holes on the side of the pipe but up high. This allows the majority of solids to settle in the bottom of the pipe.
Make sure the pipe is nice and level as to distribute the water evenly.
The size of the holes will again depend on the size of the pump or pumps you are running into the filter.
Let’s say you’re running 2 pumps into the filter via 50mm(2”) pipe. Remember that you need to have enough holes and large enough to distribute that volume of water.
A few extra is always wise to allow for any blockages. Again do a test before filling the filter with rocks and gravel.
If you don’t add enough holes it can put backwards pressure on the pump. This isn’t good. Better to have too many holes, than too few.

Join my free email list
If you would like to join my free email list click the button below.
I promise I won’t spam you, I’ll only send information I think can help you save money building and maintaining a pond.
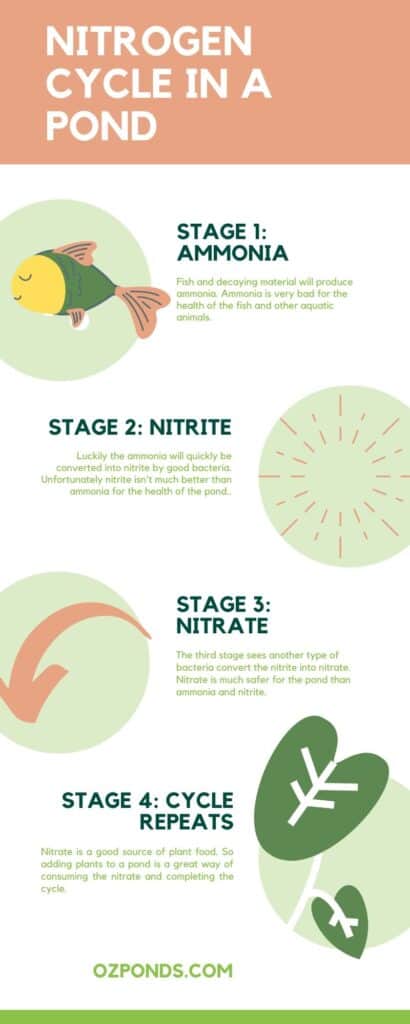
The importance of the nitrogen cycle and bacteria in a pond
Now that we’ve separated the solids and dispersed the water evenly it time to get into the nitty gritty. Beneficial bacteria is the greatest water purifier there is! And we want as many as possible throughout our filter.
As I mentioned if you want to understand more about beneficial bacteria read my post on a quick guide to the nitrogen cycle.
These bacteria are so important because they break down the ammonia and nitrite into nitrate. Both ammonia and nitrite are toxic to fish even in small doses. And both can be used as a food source for algae.
Bacteria need surfaces to grow on and that’s exactly what the rocks and gravel within the filter will provide.
Before filling the filter with rocks and gravel remember to keep the area at the bottom of the filter with as much air space as possible. This is where your solids accumulate.
On the small container filters I use nursery seedling trays. I prop them up on some bricks or rocks and then layer some larger rocks, then medium, then small.
By layering the rocks it will stop the smaller rocks spilling down the sides and entering the solids accumulation chamber.
On the larger filters you can use much larger boulders that will provide plenty of air pockets.
Or if your budget allows use specialised products such as aquablox by aquascape. These are specifically designed to create void space and when packed tightly together can handle lots of weight.
Cheaper options are large diameter slotted pipe or even milk crates if you have them available.
You can use anything so long as it can support the weight of the rocks and will provide plenty of space for the solids.
Rocks the home for the beneficial bacteria
You can use any type of rock. I like to use scoria or lava rock as it light weight, cheap and has plenty of pockets for beneficial bacteria.
Bacteria is a very robust and highly adaptable. Whatever rocks you choose there’s bacteria strains that will colonise and thrive.
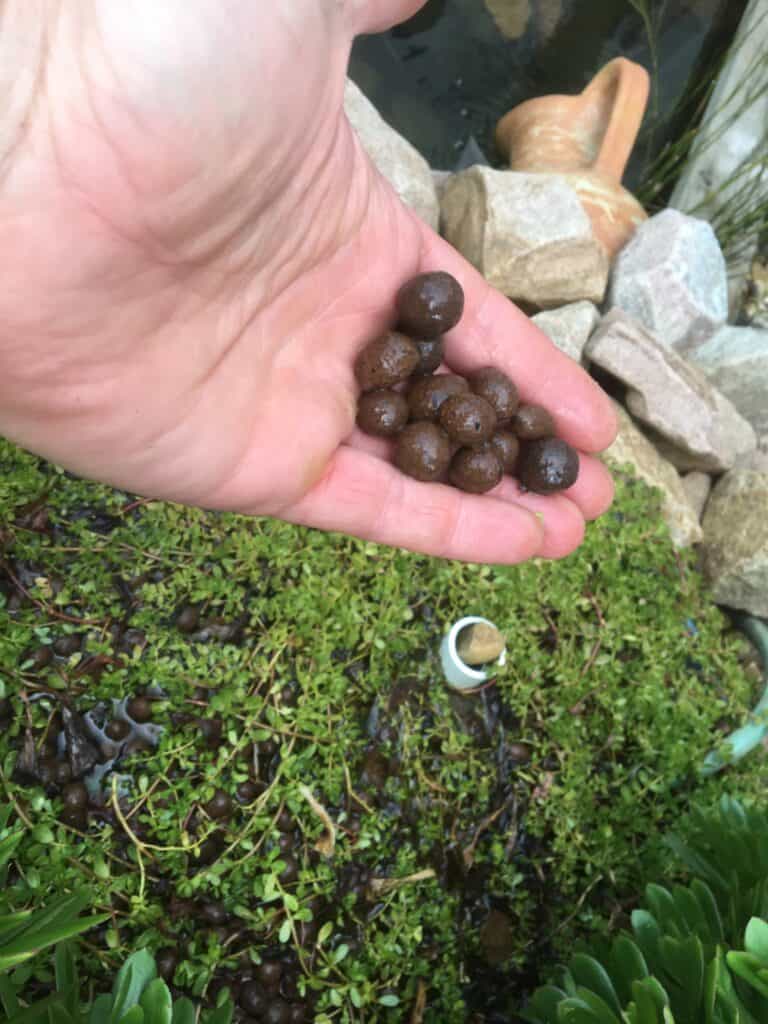
In small systems you could use aquaponic clay balls. Like scoria they are light weight but they are nice and round and much more hand friendly. No cuts and scratches!
The removal of the solids, plus the even water flow being dispersed over the large amounts of beneficial bacteria, that has colonised the rocks and gravel is doing the lions share of purifying the water.
But there’s one more step we need to remove the build up of nitrate. Remember the beneficial bacteria transfer harmful ammonia into less but still harmful nitrite. Then the nitrite is converted into nitrate.
The beneficial bacteria can consume some of the nitrates but not all. And thats where our plants come into the equation.
The power of plants for water filtration
Using plants is the easiest and laziest way to reduce the nitrate load within a pond. If nitrates reach a level over 40ppm then they are very harmful to fish.
Most small pond owners or aquarium keepers use water changes to dilute the amount of nitrate in the water. The new water has no nitrates. This is very effective but time consuming.
Plants love nitrate! Nitrogen is the most common ingredient in any commercially produced plant food.
Another type of plant that loves nitrates is algae. Excessive nitrates in the water will also lead to algae blooms.
This may be pea soup floating algae or cling to every surface string algae. Either way its a problem you don’t want!
A Wetland/bog filter will make algae and regular maintenance a thing of the past!
We plant the plants directly into the gravel and rocks of the filter. Because this area is constantly wet it’s important to use plants that will thrive in these conditions.
What’s the best plants for water filtration?
Any marginal pond plants will work great! things like Louisiana iris, canna lilies and rushes. Keep in mind not to select plants who’s roots will penetrate into the area where we are allowing solids to accumulate.
If the roots invade this space removing the solids will be a whole lot harder with a tangle of roots down there.
In small systems you can grow edibles like lettuce, mint and strawberries all of these plants don’t mind their roots being constantly wet. Or you can use any marginal pond plant with a shallow root system.
Whatever you select use a variety! The pond fish will produce waste and ammonia all year round. A good variety of plantings will ensure something is always actively growing and therefore actively sucking up those nitrates.
If you want together more inspiration read my article on 40 awesome pond plants.
Should you plant you pond plants with soil, or without?
This can be hotly debated. Some pond contractors prefer to keep the soil on the roots to help establish the plants faster.
And it’s true. Plants with soil around their roots will establish quicker. The soil already contains plenty of nutrients.
But those nutrients will be added to the water and if there’s too much for the bacteria to handle you will end up with an algae bloom.
I prefer to remove all or as much soil as possible.
As I’ve mentioned I have a background in horticulture, well us plant growers will add as much nutrient (fertiliser) to the soil as we can to get our plants growing fast and looking good.
This excess nutrient is not something I want to add to my pond on purpose. Overtime the fish will add plenty.
Hiding the DIY pond filter
There is 2 options as to where the filter sits. Is it above ground or below.
Having the filter below ground allows none of it to be visible apart from some rocks, gravel and the plants. This is obviously the best option for natural looking ponds.

The filter doesn’t need to be right next to the pond either. Obviously it’s easier but not necessary. Provided that you can pump water from the pond into the filter and gravity can return the filtered water back into pond.
This can be achieved either with underground pipes or nice natural looking streams. I like streams! They look great and provide added surface area for bacteria and places for more plants.
For above ground diy wetland/ bog filters i like to clad the filter in wood. This works best on more formal designs where you already have straight lines and edges.
You could use bricks, bamboo screens or rocks whatever fits in with the design of the pond.
Below is a video showing how I built my courtyard pond and how I hide the barrel filter.
My experiences filtering water
Aquariums
The first experiences i had with filtering water were in aquariums.
This was the first time I was exposed to the nitrogen cycle and how it relates to water health.
If you don’t understand or have never heard of the nitrogen cycle i suggest you read my article “a quick guide to the nitrogen cycle.”
The quick gist is the nitrogen cycle takes ammonia (produced by the fish) and converts it into nitrite and then nitrate.
To remove the nitrate in an aquarium we need to do water changes.
But nitrate is a plant food, so that lead me to my next project.
Grey water wetland
My next gardening with water project was a constructed grey water wetland.
I have a horticultural background and being able to utilise wetland plants to strip contaminants out of the water was fascinating to me.
Wetlands are quite remarkable natural filters and by slowing the water and passing it through a constructed wetland i was able to remove the contaminants from the water.

Ponds
After the wetland I built my first proper pond. This pond was quite an expense for me at the time so I wanted to do as much research as I could.
My main concern was i wanted the water to be crystal clear. I didn’t want to go to all this trouble just to have a hole with stagnant, smelly, green water.
This research lead me into the wonderful world of bog filters, wetland filters and aquaponics. All of these systems use plants and beneficial bacteria to purify the water and keep it healthy.
After my success with the grey water wetland project it was all ringing true!
These simple yet highly effective filters had me hooked and since then I’ve created multiple wetland/ bog filters and a few aquaponic systems.
They work every single time! Even when i don’t get it 100% right.
Summary
As you can see its not rocket science to create a simple yet highly effective DIY pond filter using easy to source materials.
These filters mimic bogs and wetlands and are the simplest ways to keep your pond water crystal clear. Not only that they require almost no maintenance.
They look amazing and are a thriving ecosystem!
Remember the 4 points: Remove the solids, slow the water, move the slow water through areas colonised by bacteria and add plants.
Using those 4 fundamentals you can design a beautiful and functional mini wetland/ bog filter to purify your pond for years and years.
Join my free email list
If you would like to join my free email list click the button below.
I promise I won’t spam you, I’ll only send information I think can help you save money building and maintaining a pond.