
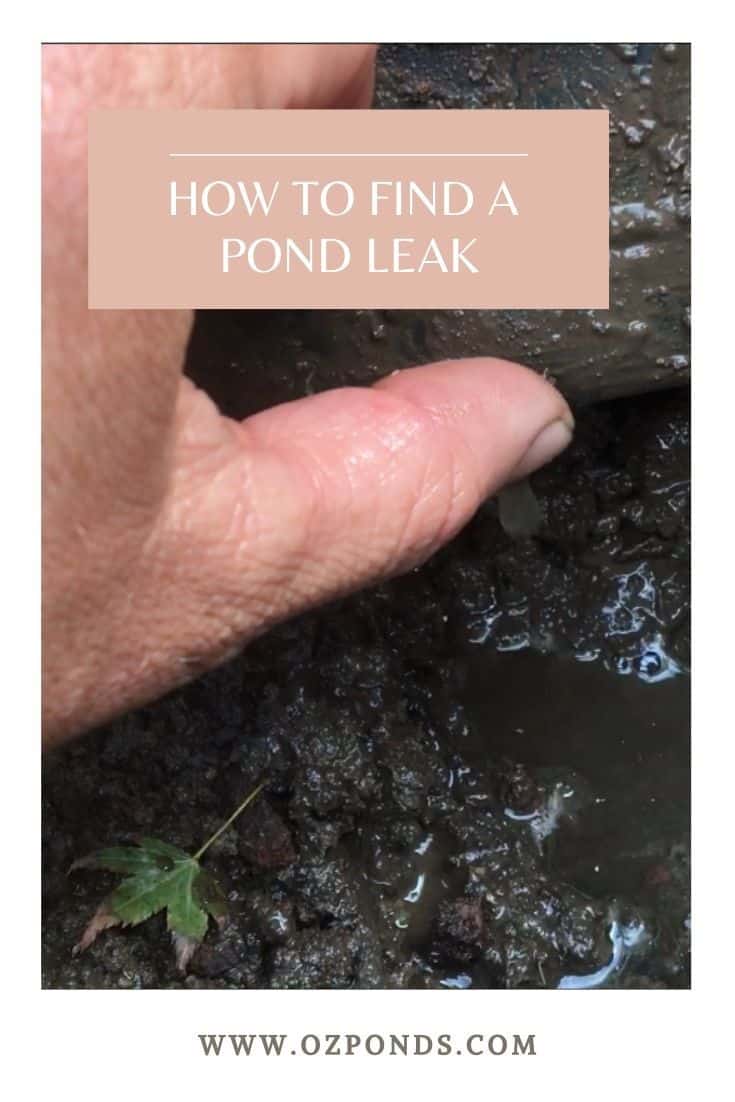
Follow the steps below to find exactly where a pond leak is located.
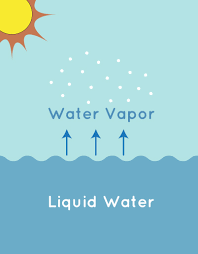
But before you panic understand that most often the cause of your concern is just plain old evaporation!
But if you are sure it’s a leak. Here are the most common areas to start searching:
- Plumbing fittings. These can come loose, weren’t secured properly or simply degrade over time.
- Edges. Overtime the ground around the pond settles. As the ground settles it can create low spots around the liner.
- Waterfalls and streams. Leaves, twigs and other debris can create small dams. The water can then spill outside of the liner.
Pond Evaporation
It’s amazing just how much water will evaporate especially during the summer months. I spent months building my first pond. Painstakingly moving every individual rock into position.
Then during the first summer I was convinced I had a leak!
I had to keep topping the water up.
Fortunately for me I have no spare time during summer so I couldn’t remove all the rocks and go find the leak.
Thank goodness. Cause the leak didn’t even exist! I was simply loosing water through evaporation.
Once the summer ended and autumn rolled in my pond leak, which i had been losing sleep over vanished!
During a hot dry summer a pond can drop 2.5cm (1in) in just one day. Most new pond owners don’t know this and like me they freak all the way out!
And if we get those hot winds you can almost watch the water evaporate!
So how do you know if it’s evaporation or a leak?
Easy!
A leak will drop the same amount of water each and every day. Provided there’s no rain of course.
But a perceived leak (It was all in my head) that is really evaporation will drop at varying amounts each day, because it’s dependant on the temperature, the sun and wind.
So patience is the key. Don’t overreact!
Wicking
Wicking is another common cause of misdiagnosed leaks. Anything that is making contact with the water and the air is acting as a wick.
For example rocks that are partly submerged will wick water up their edges. You’ll see the rock is wet just above the actual water line.
As this water is dried by the sun or the wind more water will “wick” up the rock to replace it.
In this example you’ll notice a more pronounced reduction of your water level during summer, particularly hot windy days.
Another example of wicking is when the surrounding soil or mulch enters the pond. This is a problem that should be fixed!
The soil or mulch acts as a giant sponge. And because it’s all connected to the surrounding earth it has the potential to pull larger volumes of the water out of the pond than evaporation.
This situation is easy to diagnose as you’ll notice a wet area.
Hopefully you’ve stopped reading this article cause you’ve realised your panicking over nothing.
However if you’re still here maybe you’re the 1 in 10 that really does have a leak.
Now not every leak is a hole in the pond liner. So let’s stay calm!
Let’s look for the easiest to find leaks first and rule them out.
Plumbing
The first thing to do is turn off the pump. Leave it off for at least 48hrs.
Did the pond level drop?
If it did not this is good news!
It means that the pump is pumping the water out of the pond.
So the leak is either in the plumbing (hoses, fittings and seals) or it’s the waterfall, stream or filter.
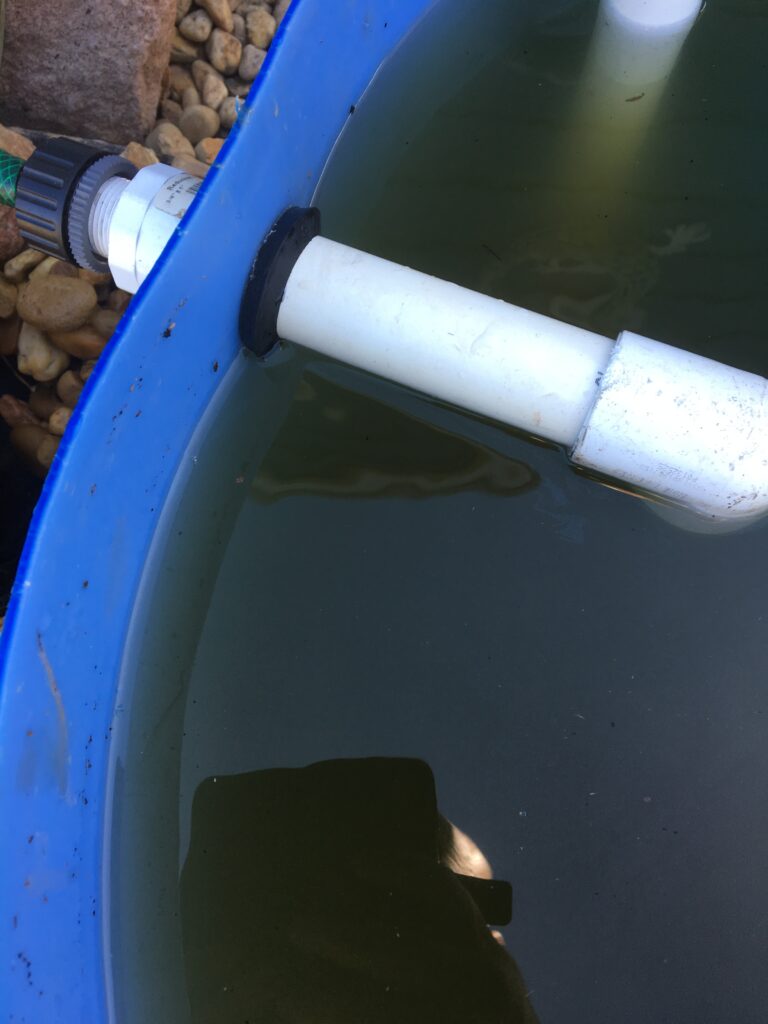
First let’s rule out the plumbing. The most common place you’ll discover a plumbing leak is around connections, so expose and check them first.
If the source of the leak is still elusive its time to check the stream and waterfall.
Water spilling out
First look for any debris build up that is creating a dam. The dam can back up the water and cause it to leak.
If there are no obvious areas where the water is pooling you’ll need to expose the edges of the liner.
This generally isn’t too hard just moving a few rocks to the side.
Now that the edges are exposed search around for any wet ground. Overtime as the ground settles the liner may have sunk from its original position.
If none of this solved the problem it looks like it is a hole in the liner.
Finding a hole in the liner.
Now finding this hole is going to take some creative problem solving.
We know the hole isn’t in the pond itself because the water level stabilised when we turned off the pump.
We’ve checked all the plumbing and thats not our problem.
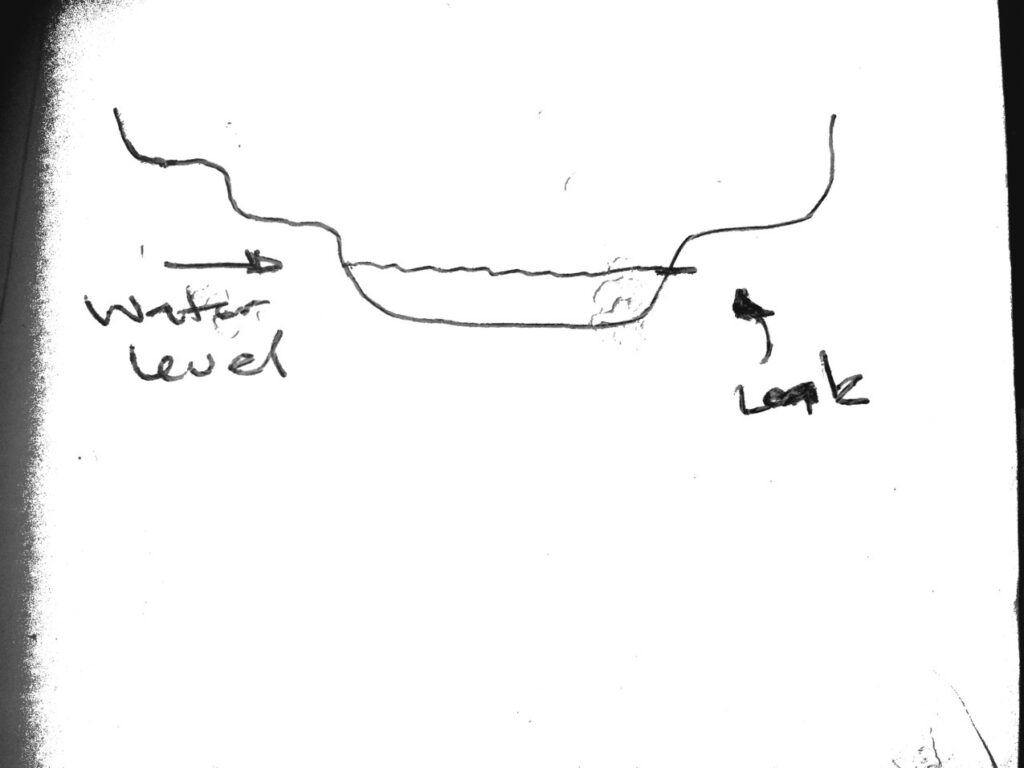
So the issue is in our stream or waterfall.But where?
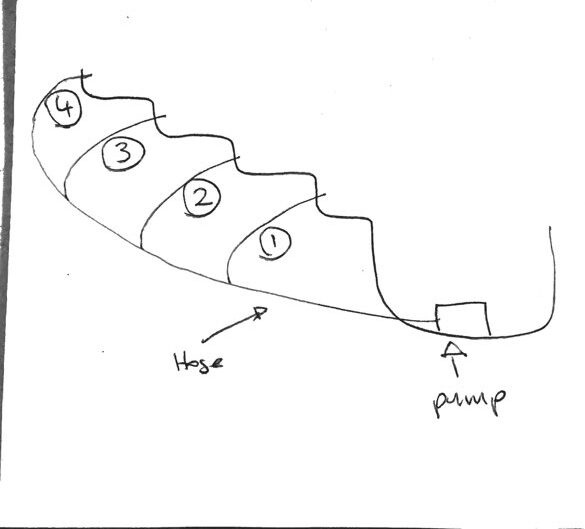
Its time to run a temporary hose from the pump to the start of the stream or waterfall. (see the sketch below)
Turn the pump back on.
If the water in the pond starts dropping again you’ve found your leak!
If not move the hose up the stream a few more feet.
By systematically checking each section of the stream we can establish the area of the leak.
Once we locate the area we can remove the rock and gravel and easily locate it.
Repairing is easy with a pond liner repair kit.
Pond itself leaking
So if your here when the pump was turned off the pond continued to lose water.
Bummer!
But before we get to down in the dumps let’s check the entire perimeter of the pond.
Before we get too carried away lets fully rule out wicking or the liner sinking form ground settling.
Remove all the edging rocks so that the entire permitter of the liner is exposed.
Check for any wet areas.
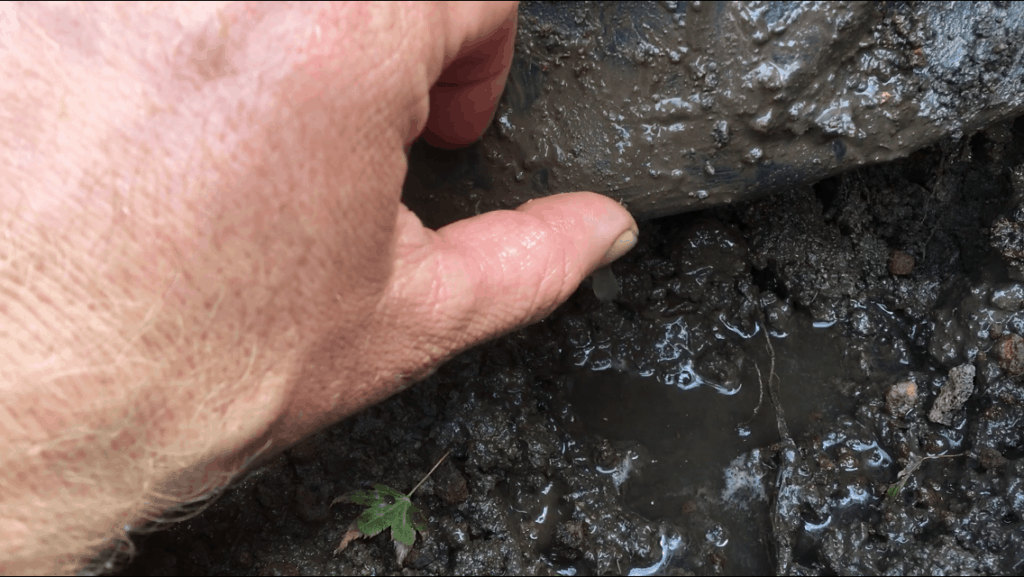
If you found the problem build up the ground on the low spot and replace the rocks,
If there is nothing here you need to allow the pond level to continue dropping.
Once the water level stabilises you’ve found the location or depth of your leak.
Now you’ll need to remove the rocks and peel back the liner. The ground should be incredibly dry except where the leak is.
Repairing the liner is really easy with a repair kit. It’s no different to fixing a tyre puncture.
Ways to prevent leaks
Most but not all leaks will occur during the construction of your pond.
Follow these best practices when building the pond to prevent leaks in the future.
- Take care when excavating the hole. Ensure you remove all rocks and roots! If the area of the pond is very rocky or has lots of roots excavate more than needed and add a decent level of sand to cushion the liner.
- Use a geotextile underlay. Again like the sand these will provide a cushion for your liner. Geotextile is really cheap and just a good investment for your pond.
- Select a quality pond liner. The best liner is epdm the thicker the better. Epdm will expand by up to 3x. It’s also guaranteed for 20-50yrs depending on brand.
- Use rocks! Rocks on the walls and bottom of the pond will protect your liner from animals and kids. ( In my household they are one and the same! ). Rocks will also act as a shield when those animals start jabbing sticks into the water (you know they will!).
- Provide areas where animals (and kids, if yours aren’t animals) can get in and out of the pond safely. If they need to scramble and claw their way in and out well…it’s not great for the liner.
- If joining pond liner say along a meandering stream, do it at elevation changes. Pull the lower liner at least 60cm under the top liner.
- If your building a really large pond and require joins that can’t be used at elevation changes, try and find a supplier that will pre join the liner for you.
- If you need to do the joins on site really ensure that the joins are super clean before applying adhesive. And allow it to fully cure before pulling or tugging on the liner.
- When positioning rocks onto the liner gently place them down. Don’t twist and shuffle them into position.
- Create shelves when excavating the pond. These will provide a nice stable footing to place the rocks.
- Use underlayment or liner off cuts under large rocks. This adds just a little extra cushioning.
Subscribe
Hopefully this article has been helpful. If you haven’t already, signup to our mailing list for special deals and discounts on pond related products.